Category: Uncategorized

I’ve done ProLon FMD Nutrition Program multiple times: an HONEST, detailed review about the full experience (is it worth it?) [VIDEO]

The following post is for educational purposes only and not considered as medical advice. Please consult with your primary care physician or health professional before beginning any new nutritional program such as ProLon. This is not A sponsored post. All opinions and experiences are honest and my own as the author.

Weellll it’s been a MINUTE since I put up a blog post, huh?! 😆😵

Hint: I include a REALLY thorough Q&A for ProLon at the end of this blog post – most of which are more detailed, additional tips to what I share in the already detailed day-by-day videos! This post will also be a work in progress as I will update to include relevant content as it is created.


I recently posted a six-video series sharing my experience doing the ProLon 5-day fasting mimicking nutrition program (which will likely include a handful of more videos, including the glucose/ketone comparison in my own personal “self-study”, a DIY homemade version, and perhaps future documentation whenever I do it again).

I even reached out to the people at ProLon after planning this video series, and they were kind enough to give me a generous discount coupon code for friends, clients, and viewers who decide to try it, too! All you have to do is go to their website and type in CATLADY in the promo code box at checkout 🤗

When it comes to the video series, I explain a lot in the videos within the series as I do take you through each day of the program in detail, but I figured it was also worthwhile to share some more things I may have forgotten here as a blog post for whoever may be curious about ProLon and common questions I’ve receive from clients, friends, and those who have seen videos from the YouTube channel.

I will likely revisit and update this blog post in the future to add more videos, as well as questions I may get emailed or left as comments. So, if you are trying out ProLon for yourself or want to refresh reminders or info anytime you do the program, feel free to bookmark this and come back in the future!

Check out my ProLon Playlist, starting with the intro video, here:

In my intro video, I speak about how I came to try ProLon for the first time, as well as details explaining the creator of ProLon – Dr. Valter Longo – and his many accolades in the fields of nutrition and longevity. Dr. Valter Longo is not only the man behind the ProLon fasting mimicking nutrition program, but he is also the Director of the Longevity Institute at the University of Southern California (USC) as well as a professor of gerontology and biological science.

Additionally, Dr. Longo is the Director of the Longevity and Cancer Program at the IFOM Institute of Molecular Oncology in Italy. He is the author of the book The Longevity Diet, which I do highly recommend reading, and he has even been nominated for a Nobel Prize based on his work in nutrition and fasting.


If that isn’t enough in terms of credentials to why this is a legit, clinically backed nutrition program, there is also the fact that Dr. Longo donates his share of profits from L-Nutra (the company behind ProLon) fully into the Create Cures Foundation to fund further research in illness prevention and longevity.

Those are just a handful of the reasons I decided to give ProLon a chance those couple of years ago. As for the other reasons and why I have done it a few times since… it’s all in the intro video 😘

Here we go, DAY 1 of 5 – let’s kick things off!:


DAY 2 OF 5 doing the PROLON FASTING MIMICKING DIET:


DAY 3 of 5 – getting over that hump!


DAY 4 – pretty much night and day from before 😍💪


DAY 5 – The Last day doing ProLon… how do I feel?!

*Stay tuned for my roundup of Day 6 and the week to follow, including how I have done the DIY at-home version of the fasting mimicking nutrition program in the past (and additional tips or tricks)! To get notified first when those videos go up first, you can subscribe to my YouTube Channel and click the notification bell*


PROLON COMMON QUESTIONS & ANSWERS:

How often do I do the ProLon fasting diet?

Please refer to L-Nutra and ProLon’s website for their official suggestions as, again, I am not a medical professional and none of this is medical advice. Always check with your physician (many of whom recommend this program to their patients, by the way)! That said, according to their clinical studies, it is suggested that those who may lean more “unhealthy” or “overweight” do ProLon three times: once a month for three consecutive months, in order to gain the most long-term benefits.

If you are generally healthy and of average weight, you likely only need ProLon once to twice a year. Perhaps up to three times a year. If you are underweight, you definitely need to consult with a physician or avoid this program. You can check ProLon’s website for more information.

Personally, I don’t go by any set frequency. I will gauge it by how I am feeling and what my body is doing. That said, it has come to more or less about twice a year since I did my first ProLon 5-day nutrition program over two years ago.


Who shouldn’t do ProLon?

This isn’t so much a personal answer as something important to note. As suggested by ProLon professionals on their website FAQ and within the instructional pamphlet, those who are pregnant should not attempt this nutrition program – nor should those who have had any bariatric surgery or procedures as such individuals have more specified protein and micronutrient requirements vs the general population.

Regardless, always check with a medical professional before beginning this type of nutrition program if you have any medical issues or concerns to ensure that this is a good choice for you. I especially stress this for those who may struggle with disorders such as BED (Binge Eating Disorder) or similar, as some restrictive-style programs like this 5-Day Fasting Mimicking diet may exacerbate issues in individuals with currently existing disordered eating. Namely, in disorders involving active binge/purge cycles.


When do you feel like you need to do ProLon again?

For me, it’s when I’m feeling sluggish, tired, inflamed and constantly bloated for a longer than normal period of time (more than 2-3 weeks). Unsurprisingly, this typically only happens after a few weeks to a couple of months of eating too many foods too often that aren’t a part of my usual routine. 

I do also have a “set comfy weight range” of around 6-8 lbs that I have always stayed within to feel my best, and if I find that I have surpassed that range by a couple of pounds for more than a couple of weeks as opposed to just the up and down, ebb and flow on random days (which is what happens with weight day-to-day!) – then I will consider ordering ProLon do it again.


Is your DIY version of ProLon as good as the actual ProLon nutrition program?

Yes and no. 

Pros of the DIY: It saves you money, it’s fairly easy to organize, weight-loss will still happen due to the caloric deficit, it can potentially encourage more stable glucose levels and expedite entering into ketosis to utilize fat as fuel. 

Cons of the DIY: Not as effective when measuring glucose and ketone levels (would have to extend it to 6-7 days vs 5), not clinically studied and created like ProLon, some ingredients will differ, more likely to “give up” or not commit during the DIY because it lacks the financial investment to justify pulling through.

Honestly, I would suggest doing the actual ProLon nutrition program first to have something to gauge from in terms of how it felt, your progress from start to finish (both physically and mentally), and how it helped you maintain the benefits afterwards. Then, you can try the DIY version and have something to accurately compare it to. If it works just as well for you as Prolon did, then there you go! 

Not to mention, purchasing ProLon justifies itself a little more – to me, anyway – seeing as Dr. Longo donates 100% of the profits from his share back into the Create Cures Foundation to further research on illness prevention and longevity. So the expense does go to a good cause.


Does ProLon help you lose weight?

Yes, but keep reading.

First of all, I get that it’s touted as a “weight loss” or “cleanse”, “detox”, “diet” (UGH if you watched my videos you know I can’t stand these trendy catchwords!) when you see the ads and marketing everywhere. One of the reasons I wanted to create this series of videos was to give you an accurate, more science based, non-Instagrammy take from someone who isn’t only making a sponsored post for money (I am not sponsored by them!) but who is educated in nutrition, physiology, fitness, fasting, along with years of working with clients.

Note: Weight and carrying extra weight is a symptom of something else going on within your body, due to your lifestyle and habits, emotionally, or all of the above.

That said, will you lose weight on ProLon? YES, it will cause you to lose actual weight on the scale. How much is variable, but I have found in the average person the weight-loss is 5-7 lbs. (if you are heavier, you may even reach around the 10 lb. mark). Personally, my weight will go down about five pounds when I wake up on day 6. And most of the time, I will lose another 1-2 pounds in the following days, before my weight stabilizes back at my initial 4-5 lbs. loss. 

A lot of this is due to the fact that you are eating in a caloric deficit throughout this 5-day nutrition program. If you are eating less than you expend AND are carrying less food in your system, that will result in loss of weight.

I do also believe – in my case and in what the ProLon research has actually shown – the ProLon 5-day fasting nutrition program causes autophagy and cellular rejuvenation within the system, alleviating inflammation from within the body that would contribute to excess weight. THIS is what makes it different than the “fad diets” or *gag* “cleanses” or *double gag* “detoxes” that are out there, which simply cause you to lose water weight or flush out your digestive tract.

In my experience, I believe that ProLon works to help you drop and eliminate inflammation which will also cause a decrease in weight by default. So, for me, I lost about 7 lbs. in total (including the couple of days after it was over) before settling back to a loss of 4-5 lbs. which I managed to maintain until months later after my standard routine took a turn again.

ProLon was created in a way to actually reset you from a metabolic level. That is the difference I felt in doing it, and that is why I am open to promoting it on my own as an individual (again, not sponsored!) and professional in fitness and nutrition. This is in a different category than any fast, fad diet if you recognize what it’s doing and adjust your lifestyle afterwards to honor maintaining the benefits you’ve gained from doing it.


What were some benefits (or other weird things!) you noticed after doing ProLon?

I’ll just make a list of bullet points…

    • Cravings were reset. I didn’t need to use as much stevia when sweetening food or drink, for example. Or salt. It really helps to reset and re-sensitize the taste buds as well as cravings, in general.
    • Appetite and portion-size needs were reset. Obviously, this will shrink your stomach a bit. But you learn – especially towards the last couple of days – that you not only feel clear-headed and energized, but light and without any bloating or “full” feeling to weigh you down.
    • Flatter abdominals (namely lower/reproductive area). I am specifying this because people like to say “flatter stomach or belly”, but for me personally, that hasn’t been much of an issue. My bloating tends to happen in the lower abdominal area. Think intestines, reproductive area, between your belly button and your pelvis. By doing ProLon, EACH time it has completely alleviated any bloating. Not only that, but it seemed to have indefinitely reset it. For weeks after, I would not get bloated – even after occasionally eating foods that may have caused it in the past. My weight also seemed to stay in this new default much easier, rather than fluctuating according to what I may have eaten the day or night before.
    • Really seemed to “reset” my body and digestion. Just like I mentioned in the last couple of sentences above, something about ProLon (and honoring how I felt after finishing) really did seem to promote a longstanding feeling of wellness. For me, that meant great energy, less susceptibility to bloating no matter what I ate or where I was in my cycle, an overall feeling of inflammation that I didn’t even recognize before now being gone, and with all of this lasting a while after the nutrition program was over.
  • I just felt rejuvenated from the inside and better. That’s pretty much it. I was surprised at how good I felt afterwards and, most of all, how it actually lasted. If you take what the program has to give and go with it long term – especially following the Longevity Diet protocol from the Blue Zones, which are both great books – then you are sure to feel the same benefits that I did.
  • I slept more deeply and stopped having wild, super-detailed dreams by day three. I noticed I was having what seemed to be nightly, epic movie style crazy dreams for weeks beforehand. As fun as they are – and as often as I have them – I also felt like I was waking up less rested than usual… especially with night-after-night of a pumped, action-packed imagination! I’d already made a correlation a long time ago between more active dreams and even nightmares, with eating something very sweet or sugary close enough to bedtime.  


Do you workout while you’re doing ProLon?

I go for a walk daily to get at least 8,000-10,000 steps in, so I did still do that. As for strenuous exercise, I typically avoid that (and it is suggested to avoid it) during the fasting program. At most, I will do some low intensity weightlifting or bodyweight training that is slow paced and not too taxing. But it all depends on the day and how I am feeling.

As you could see in my Day 4 and Day 5 videos, I felt AMAZING and actually had one of the best feeling workouts I could remember in recent history. So, again, it all depends on how you are feeling and honoring that.


What tips do you have to get through ProLon for anyone else doing it?

Schedule to do it during a span of time where you either know you will be busy or can make yourself busy (ideally, with things at home). One of the best parts about any fasting is how much open time you have to focus on other tasks or things instead of eating or planning around food!

Also, schedule it in a 5-6 day span outside of holidays or social engagements. Doing so will only make it harder for you, and you’re likely to get slack from people around you who don’t “get it”.

When it comes to days of the week, that doesn’t matter. But in my mind, I prefer to do it Monday-Friday or Tuesday-Saturday, depending on what I have going on.

If you’re easily swayed, avoid grocery shopping the week prior and especially avoid having snacky or favorite foods or treats in the house. There are some who make the commitment and stick to it with no problem (it’s ONLY five days, people!) and there are some who are easier to break. This is also why I suggest investing in ProLon before trying the DIY version. The investment locks in commitment for most, whereas DIY doesn’t necessarily.

Do it with a friend! Especially if you are living with a roommate, spouse, or adult child (I would not recommend this or any “diet program” to a child or even teenager, never mind anyone with a history of disordered eating), having an accountability partner will help support you both mutually.

Drink warm or carbonated water (remember: no additives, flavors, sweeteners, etc.) during the day to help against hunger pangs if they are becoming too distracting for you. The hunger is going to be inevitable, but something else ProLon teaches you is you CAN get through it and you’ll be just fine!

If you drink coffee or any caffeinated drinks, ease off of it in the week (or longer) prior to starting ProLon. Same goes for alcohol. Basically, the more vices or caffeine/alcohol you have as part of your routine right before starting, the harder you are making this for you in terms of experiencing headaches, fogginess, fatigue, along with withdrawal symptoms.

If you can, go to bed early and wake up later – or at least go to bed early! Good, sufficient sleep is vital for your health and it will also help your body work AND leave you with less hours during the day to feel hungry. That said, I find that my body seems to require less sleep time when I’m in a period of caloric restriction (i.e., waking up feeling refreshed and energized after only 6 hours vs. my typical 7+ hours and some grogginess). So, the ability to sleep in later almost seems like a task in my experience.


What do I do when I’m finished with ProLon?

Have a plan for when it’s over and honor how your system feels! Don’t just go right back into stuffing yourself if that was your habit before. Or big indulgences, cups of coffee, or alcohol. Follow the transition diet that ProLon recommends in their instruction booklet and do your best to follow principles of The Longevity Diet moving forward. You can also try L-Nutra’s meal plan service, Nutrition for Longevity. The first time I did my ProLon fast was when this meal service was just launching, so I decided to get a week’s worth of meals and they were really convenient and delicious with perfect portion sizes. Plus, the food aligns with the different foods from the Blue Zones. NOTE: If you want to try Nutrition For Longevity, click here to get $10 off your first order

*Again, NOT SPONSORED at all! I feel like I need to keep reminding because I feel like I’m beginning to sound like an L-Nutra spokesperson 😆 The link is their “refer a friend” rewards system that anyone can sign up for, giving you a discount and me credits towards my own meals from them. Win, win!

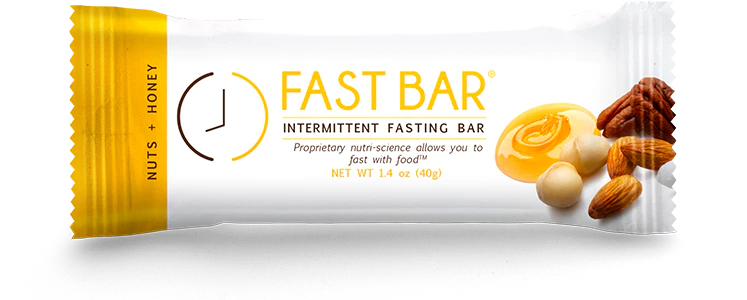
I do suggest trying out some Fast Bars or ordering them to have on hand by the time you are finished with your ProLon fast. They’re helpful in transitioning and VERY tasty – super similar to the L-Bar in the 5-day fasting nutrition program. If you know me and food recommendations, you know I wouldn’t suggest them if they didn’t taste good and prove to be a great option for on-going success. 

As I mention in the Intro video for my ProLon experience, I was a test subject in the Fast Bars clinical study myself! NOTE: I also reached out to L-Nutra and got a coupon code for you guys to use if you want to try a box (or a few boxes!) yourself. They were kind enough to create one for us! Go here and use promo code CATLADY or CATLADYFITNESS at checkout for a discount off Fast Bars


Still want to learn more about Dr. Valter Longo’s work and the science behind fasting and longevity? Here are two of my favorite informational interviews where he discusses his work in more detail. They are great conversations and are fairly long, but well worth listening to:

Remember to use promo code CATLADY for a discount if you decide to try ProLon for yourself (or if you decide to grab some Fast Bars you can use it on that site, too)!

If you have any questions or want to schedule a private session for online Nutrition Coaching, you can check out your options here. You can also check out my best-selling books such as The Holistic Fitness Starter Guide, The Grocery Store Tour Guide, The Coolest Cat Coloring Book for humans of all ages, and other resources available to you at any time here

Shaving my head to show you a DIY Buzz Cut (with clipper length examples & guide!)

I’m shaving my head. Well, I shaved my head.

Well, I gave myself a buzz cut, to be more specific.

But instead of just leaving it at that, I wanted to provide a resource for anyone else (girls or guys) looking for examples of the different clipper lengths and what they look like on a real, live head. I looked for some kind of clipper length guide before buzzing my own hair off myself, and couldn’t find but TWO videos showing semi-decent comparisons (one was a burly bearded man, the other was a fake-haired mannequin)!

So I decided to share my experience doing a DIY buzz cut at home (yes, as a girl) so I could create this resource and show you what clippers #6 through #2 look like…

Ya know, in case you want to join the buzz cut fam.

You’re welcome:

So, I know what you may be thinking: another girl shaving her head…

Why are girls shaving their heads? Is this some kind of movement? Are women trying to put across some message of empowerment or something similar by chopping off their hair so drastically?

Honestly, I have no idea. You’d have to ask each female who decided to shave or buzz their hair, because I’m sure each answer or reason would be different. I can tell you my answer to all that which is.. Nope. I just really felt like it. 🤷🏼‍♀️

That said, I also made a video sharing 10 of the reasons why I shaved my head… and why you may want to, too. Spoiler: My main reason is (see above) I really just wanted to (riveting, I know).

Despite that, I can recognize that my answer isn’t detailed enough for the majority of people asking the question who want to learn more. So, here are ten reasons that support my main reason to why I decided to shave my hair off as a girl.. er, woman.. okay, female.


Are you thinking of shaving off your long locks? Do you know anyone who has given themselves this dubbed “quarantine cut” – whether female or male? Can you relate to my reasons for giving myself a buzzcut at home?

Leave me a comment on YouTube for either video and let’s discuss it 😻

Psst… remember to subscribe and join the Cat Lady Fitness (formerly True Health Trifecta) YouTube family, too.

Extra psst… for even more exclusive perks, content, and personal things I share – become a Purrtreon supporter!


How to do a Chin-Up [VIDEO] – Progression Exercises & Cat Lady Problems

If you haven’t checked out my sister site yet, please do so at CatLadyFitness.com – there you can find the health transformation story of Puppy the Cat, the popular Raw Cat Food Recipe (and  highly-viewed video on YouTube), cat lady and dad tips, very stylish apparel and accessories for any cat lover in your life, and much more.


This year has been a crazy one for sure.

Not only have I been busy training my amazing online clients, meeting new ones during nutrition consultations, and growing my Cat Lady Fitness YouTube Channel; but I have published two more books, am currently working on another two, and am less than a month away from launching the True Health Trifecta Private Client Portal – which will offer over 200 exercise examples, ready-made workouts, and much more…

All of this while getting the amazing experience to house- and pet-sit around the world while finally learning fluent Spanish.

Calle Calzada at dusk in Granada, Nicaragua

This doesn’t even include exciting news about my FIRST book, The Holistic Fitness Starter Guide, and additional non-fitness related projects and creations that will come into light soon. (If you want to be up-to-date on the reg, I highly suggest following me on Instagram or liking the THT Facebook page.)

What can I say? I truly love being able to share my learning experiences and creative outlets with each and every one of you (and am obsessed with the productivity factor in doing so)!

SO, moving onto this post: a common question I’ve gotten over the years – ESPECIALLY from my female clients – is “why can’t I do even one chin-up? WHY are they so hard?“

In the quick video below I am going to show you some of the most effective exercises and exercise progressions towards Chin-ups and Pull-Ups that I personally used and have suggested to a number of clients over the years who can now also successfully do all kinds of chin-ups and pull-ups.


So what’s the difference in a Chinup or a Pullup? In order from least to most difficult:

Chin ups (reverse grip)    Parallel Grip    Pull-Ups (Narrow or Wide Grip)


Technically, this makes Chin-Ups the “easiest” BUT that certainly doesn’t mean they are easy… especially for someone who has never been able to do one before. Pull-ups isolate your Lats (aka: batwing muscles) making them more difficult to do, while Chin-Ups utilize the biceps more – which is why Chin-Ups of all kinds are my #1 suggestion and favorite personal exercise when it comes to building big, strong biceps.

So if you’ve been slaving away doing a million different versions of the bicep curl… whether they’re machine-assisted bicep exercises or the free weight variety… and you have been seeing little to no progress in those guns: STOP NOW and start doing these progressions.

What I will be going over and showing you today will help not only with building bicep strength and Chin-Up capability, but will help you activate and strengthen the right muscles to progress to full Pull-Ups, too.


LET’S START WITH SOME IMPORTANT FACTORS IN HOW TO PROGRESS WITH ANY EXERCISE:

  1. Activating the correct muscles. Especially if you are new to working out or exercise in general, this is always an important step to make sure you’re training your body to progress in the best way AND avoid injury. Body weight exercises, static holds, and slow/controlled movement activities like yoga or Tai Chi are great ways to get started, especially if you come from a super sedentary place. This also helps you build the mind-muscle connection which is a key factor in strength progression and physical and mental control.
  2. Strengthening these said muscles. Women actually tend to build strength a little quicker than men, but we also have it plateau more quickly. This is solely due to hormones seeing as women cannot naturally, comparatively put on as much muscle mass as men in general. Men, on the other hand, may see their lifts progress at a slower pace but can far surpass the weight that women can lift. So even though any capable female can and will progress in their Chin-ups by following these tips, that doesn’t mean you will be able to do it with an additional 25 or 50 pounds in plates hanging from your waist.
  3. CONSISTENCY IS KEY. PATIENCE PATIENCE PATIENCE – not only in your overall progress, but when you are completing these exercises… don’t rush through them. Practice focusing on the mind muscle connection and being present in what you are ACTUALLY doing. Same thing goes for overall progress – as long as you focus on the daily or whatever routine HABITS and consistent practices that ALIGN with your goal, in this case – getting better at Chin-ups or simply being able to do one at all – it will happen. It’s about trusting the process and focusing on the most PRESENT steps you can take to get there.
  4. The less you weigh, the easier it will be. It’s simple physics. The less weight you have to lift, whether it’s groceries or books (or your body in this case), the easier it’s going to be… of course, considering you have no physical injuries making you less capable. This is true in general whether your body is composed of muscle OR fat – but remember, the more MUSCLE mass you have, the stronger you will be and the more weight you will be able to lift. So that ideal “healthy” standard of having low body fat and moderate muscle still stands true.


FUN FACT:

Chin-Ups are actually a go-to active tool I use to gauge my weight. I have a 10 pound standard comfy weight range (if 10 pounds seems generous for some of you, I’m also very tall)! If I can do 5 or more slow and controlled chin-ups, I know I’m at a very lean low-end of this range – if not a pound or two below it. If I can do 1 or 2 chin-ups, I know I’m within a certain 3-5 pounds. If I can’t even do 1 – and this does happen – I’m either at the higher end of my comfy weight range AND/OR I haven’t been able to do my regular daily routine for over two weeks, usually due to traveling and not having access to a pull-up bar.

If scales aren’t your thing, this is a great way to measure your progress and keep things in check along with paying attention to the fit of your clothing. I talk more about the benefit of NOT weight yourself in this blog post.


SO, WHAT IS INVOLVED WHEN DOING A CHIN-UP?

  1. Grip Strength (all exercises will involve grip and I am showing one of my favorite grip strength exercises in this video that is very effective – Monkey Hangs. However, if you are interested in more grip-specific exercises, let me know in the comments below the video!)
  2. Mobility (full range of motion is super important to activate and strengthen the necessary muscles, ligaments, and tendons for any exercise. Unless an exercise is designated as a semi-repetition exercise, always take your time in completing the full range of extension and flexion to get the most benefit.)
  3. Slow and Controlled movement (NOT the typical momentum-based “kipping” style you see in CrossFit type activities) – slow and controlled movements build adequate strength, are better for joints and tendons, and are safer to avoid any injury which should always be a priority.


Now, let’s see what these progression exercises look like! Check out this video:

(Exercise Examples start at 2:20)


Exercises are shown in out-of-the-norm circumstances (using a bench press station and the back of a leg press)… Proof that there is never an excuse, only a reason to get creative! You can also use the underside of step-stairs, any stable bar at a proper height, the underside of some treadmills, and a stable/heavy table.

That said, the best option if available is a Smith Machine as the bar can be adjusted to multiple heights for multiple strength levels. A squat rack is a comparable option in most cases.

EXERCISES IN ORDER SHOWN:

  1. Flat Horizontal Rows (do not press through legs, focus on using arms and back only – while keeping your body straight. This is my favorite and VERY effective along with #10 and #12!)
  2. Reverse Grip Short-Range Static Hold with Slow Negative (great activation exercise to practice before attempting Full Chin-Up Static Holds)
  3. Beginner Seated Horizontal Row (complete SLOWLY and focus on muscles in arms and back, keeping good posture and holding when chest is at bar)
  4. Intermediate Seated Horizontal Row (a little bit more of a decline in the positioning increases the difficulty)
  5. Reserve Grip, Seated Slow Negatives (partial rep – if done properly, should really be felt in the biceps and front delts)
  6. Shallow Horizontal Rows (begin with more vertical positioning until you can comfortable complete 20 slow, controlled repetitions. Then move onto…)
  7. Intermediate Horizontal Rows (once you can complete 20 slow, controlled repetitions of this comfortably with good form, move onto…)
  8. Horizontal Rows (the bar is at somewhat of an awkward height and should be closer to the ground, but hitting muscles from new angles like this can also benefit new activation!)
  9. Reverse Grip Standing Rows (a different grip helps to activate different muscles. Just make sure the bar is at an appropriate height to get a comfortable, full range of motion)
  10. Monkey hangs (shown in wide overhand grip – thumbs can be over the bar or wrapped around. Hold on and hang for as long as possible – making sure that your lats are engaged and there is no swinging. If you look like your loose and shrugging, your lats are NOT engaged properly!)
  11. Full Chin-Up Static Holds (step or jump up into position – you want all your strength to go into holding, not pulling. Make sure your elbows are locked down and lats/mid-back are engaged. Avoid any swinging and hold as long as possible).
  12. Slow Negatives from Chin-Up Hold (again, step or jump into position – strength should be kept for the negative portion, not used for any active pull-up portion. Aim for a 10-second drop from the hold to full range straight arm, completing the movement evenly with no jerking or uneven demounting speed. A helpful tip is to aim for halfway – or upper arm parallel to the ground – at 5 seconds. This, #11 and #8, are especially helpful and effective in increasing Chin-Up Strength!)

If you want more PERSONALIZED coaching or insight, you can choose the best option for you here to schedule a Skype, Google Hangouts, or WhatsApp session: ONLINE FITNESS & NUTRITION COACHING

That all said, I hope this post and video were helpful for you in your Chin-Up journey! Try some of these exercises out whether you want to get your FIRST Chin-Up or simply want to strengthen and condition the right muscle groups in order to do more. And of course, remember to SUBSCRIBE to Cat Lady Fitness on YouTube for weekly videos!

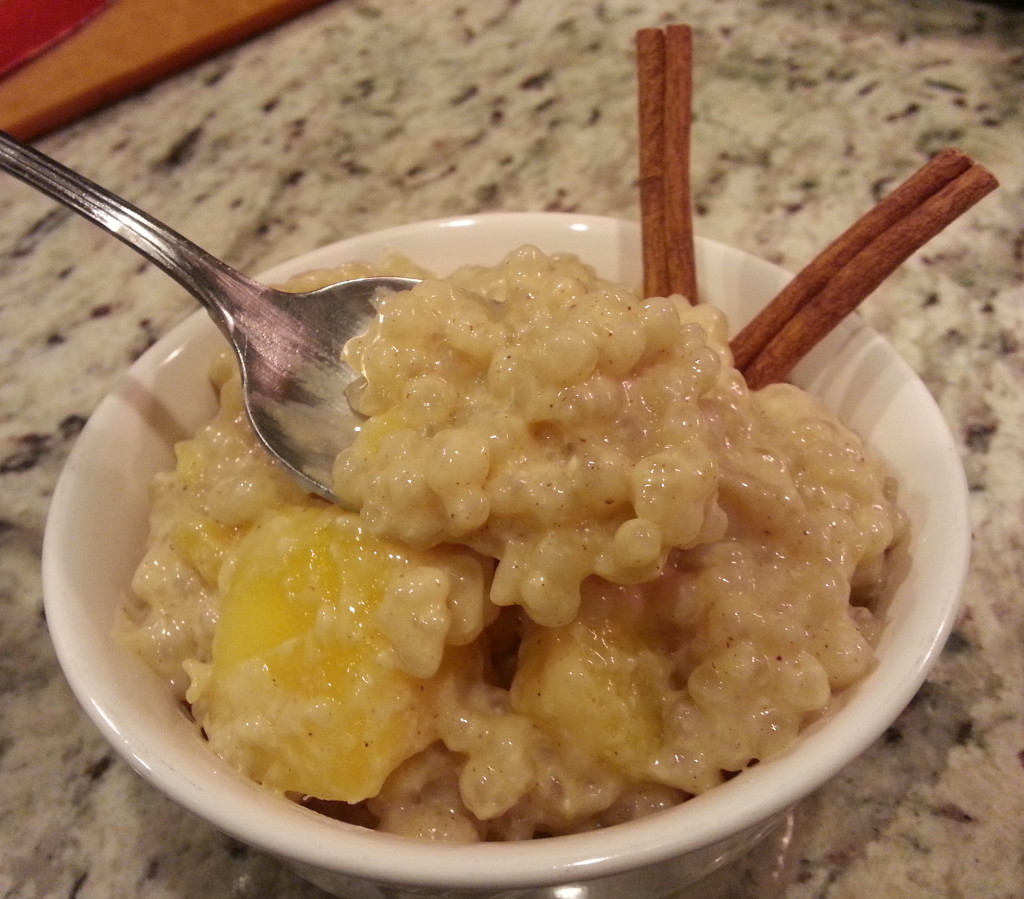
The BEST Tapioca Pudding with Mangoes – sweet, amazing, gluten/dairy free dessert! (RECIPE)

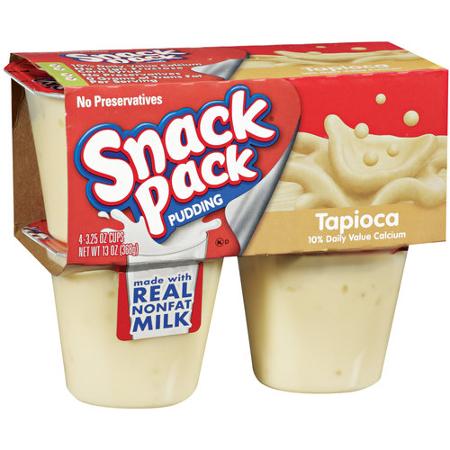
Does this look nostalgic to anyone?

k2-_66aae989-09e8-45c4-8d64-0b5773c3dd42.v1I may be in the minority here, but I never had tapioca pudding as a kid. I never even knew what tapioca was and remember wondering if it was just a different name for rice (since rice pudding was actually familiar). I was never a fan of milk or milky things growing up, either, so I never made an effort to try it. Regardless, it was easy to see many a lunch box contained these little sugar-packed and highly processed snacks.

Fast forward twenty-or-so years and tapioca entered my life again. I’ve used tapioca starch as a thickener in recipes for a while and noticed it within the ingredients to many packaged foods, but was still yet to make my own version of this renowned dessert known as Tapioca Pudding.

I don’t know what took me so long… because it is absolutely amazing.

20151226_192434

Though I don’t exactly have anything to compare it to – my prime taste tester did happen to love those school-time snacks back in the day. And I am happy to report he said this isn’t even comparable since it’s the best tapioca pudding he’s ever had (and, possibly, the best pudding dessert he’s ever had). Yet another win!

So, what is tapioca anyway? Tapioca is a starch extracted from the cassava root (which is becoming more commonly found in grocery stores these days – probably next to the potatoes or yucca).  Similar to other starches, it can be processed into sticks, powder/flour, flakes, or fun little pudding-worthy pearls. The pearls are commonly used in Asian desserts where they lend a chewy, satisfying texture to whatever it may be. Oh, and for those wondering, it is indeed gluten free and vegan.

Fun fact: Have you ever had Boba tea? Those boba are actually giant tapioca pearls.

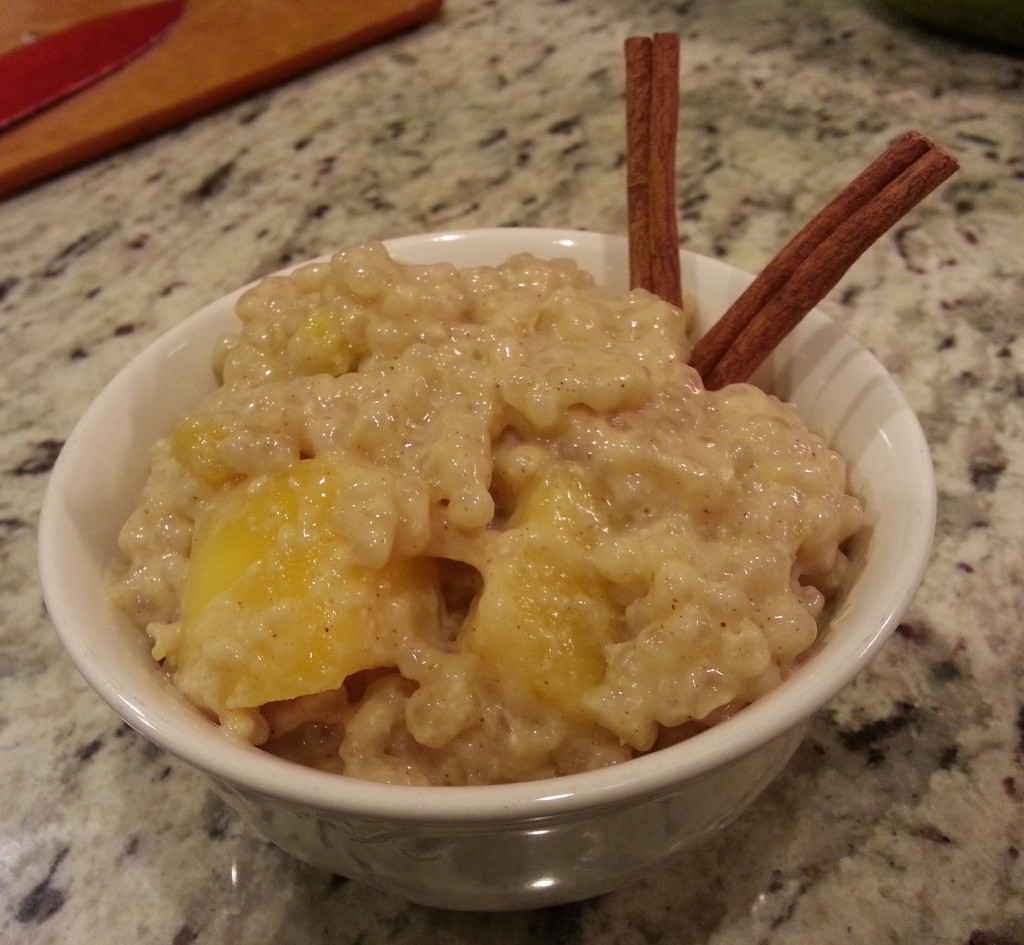
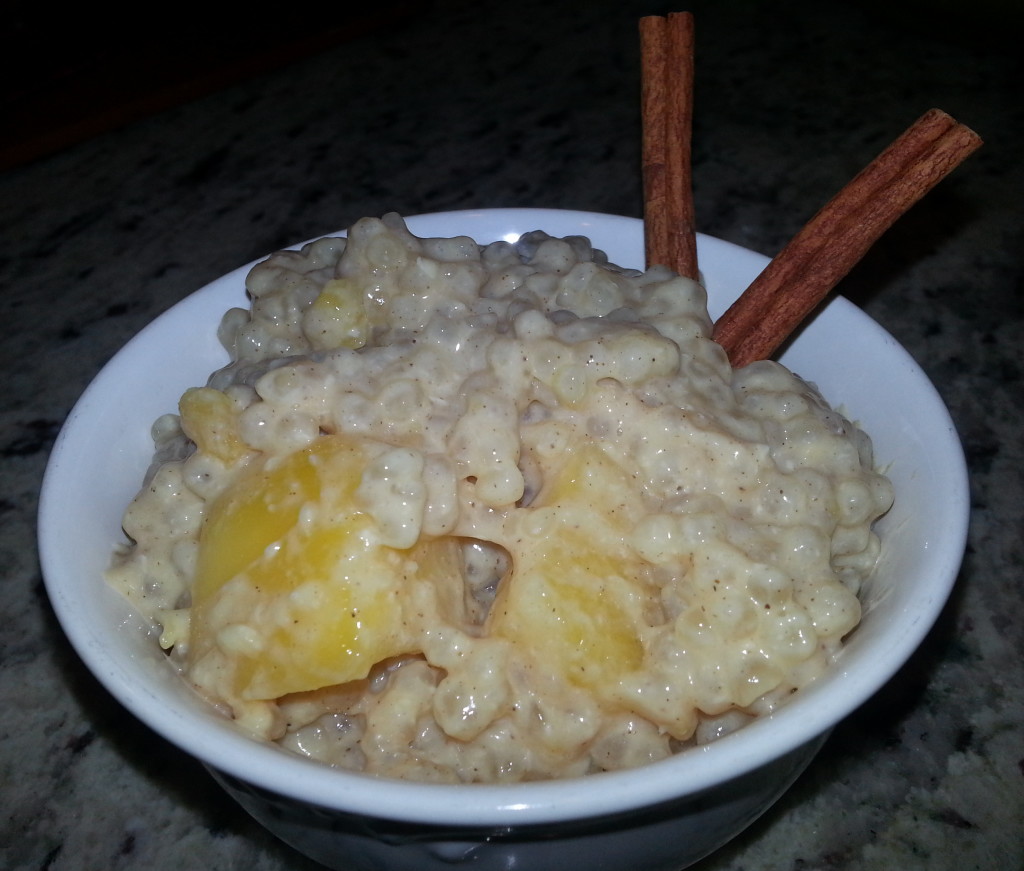
Personally, I absolutely love the texture of tapioca pudding – even more than rice pudding. It’s like eating spoonfuls of simultaneously creamy and chewy surprises with every bite. Plus, by adding sweet, buttery mango, this dairy-free version is also both rich but light at the same time. It can be eaten hot or cold, making it perfect as a summer or holiday dessert.

It’s easy to make, doesn’t dirty many dishes, and has a handful of quality ingredients that are easy to find and much better for you compared to the original kid’s snack.

20151226_124854-1

Just looking at these pictures reminds me I need to make this again, like tonight. It’s that delicious and that easy to put together. Did I mention that it tastes even better after a couple of days in the fridge?

20151226_192502

I really, really hope you try this recipe. You will be so glad you did (and will impress anyone who tries it!)


THE BEST TAPIOCA PUDDING with mangoes

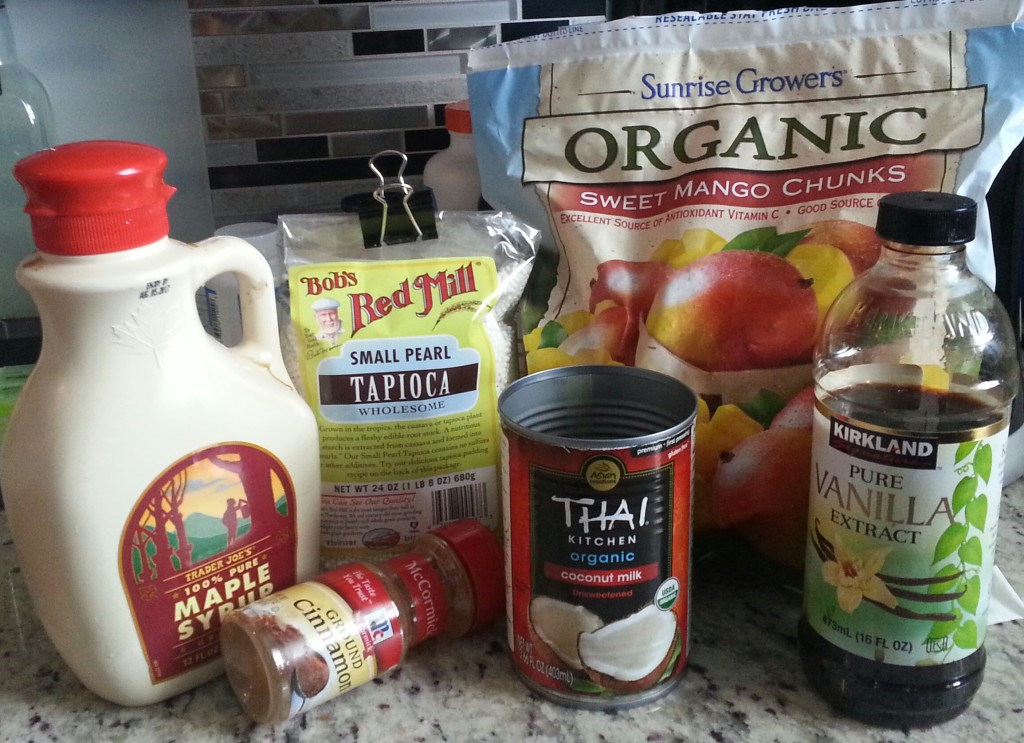
Ingredients

½ cup tapioca pearls

½ of a 14 oz. can of Coconut Milk (~200ml)

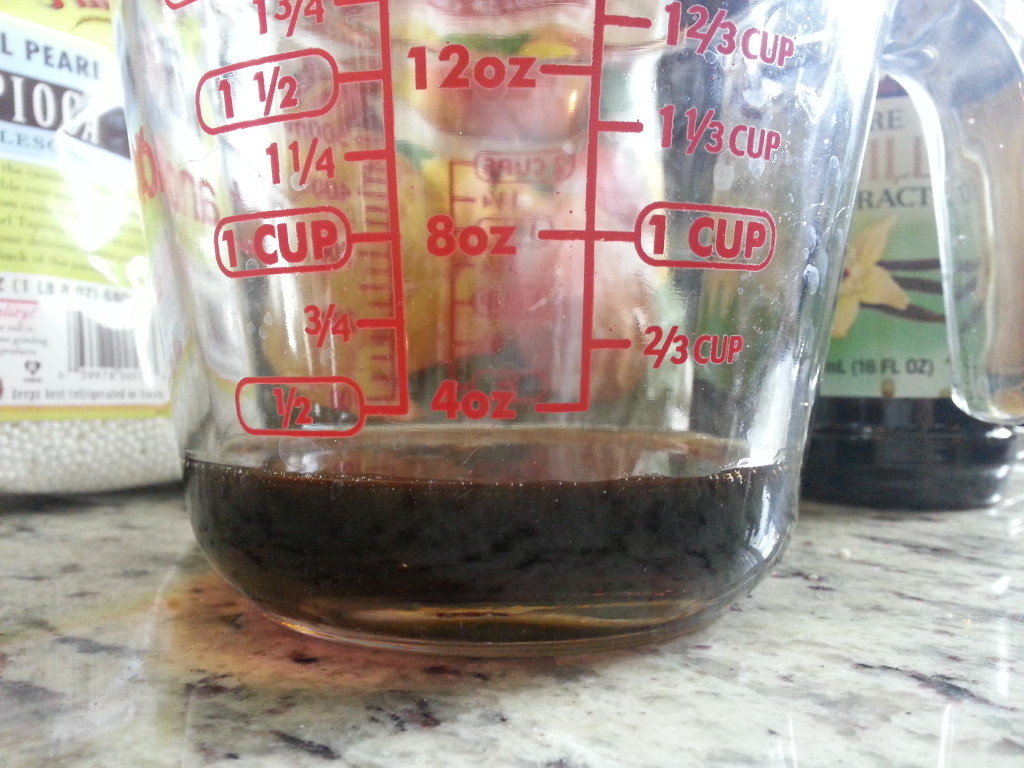
¼ cup maple syrup

¼ tsp salt

3 Tbsp stevia-for-baking or xylitol (or sugar of choice)

1 tsp pure vanilla extract

¾ cup unsweetened vanilla almond milk

½ cup + ½ cup water

¼ tsp ground cinnamon

~2 cups chopped mangoes (frozen or fresh)

Optional, for thickness: 1 egg, separated (yolk and white)

Directions (with photos below)

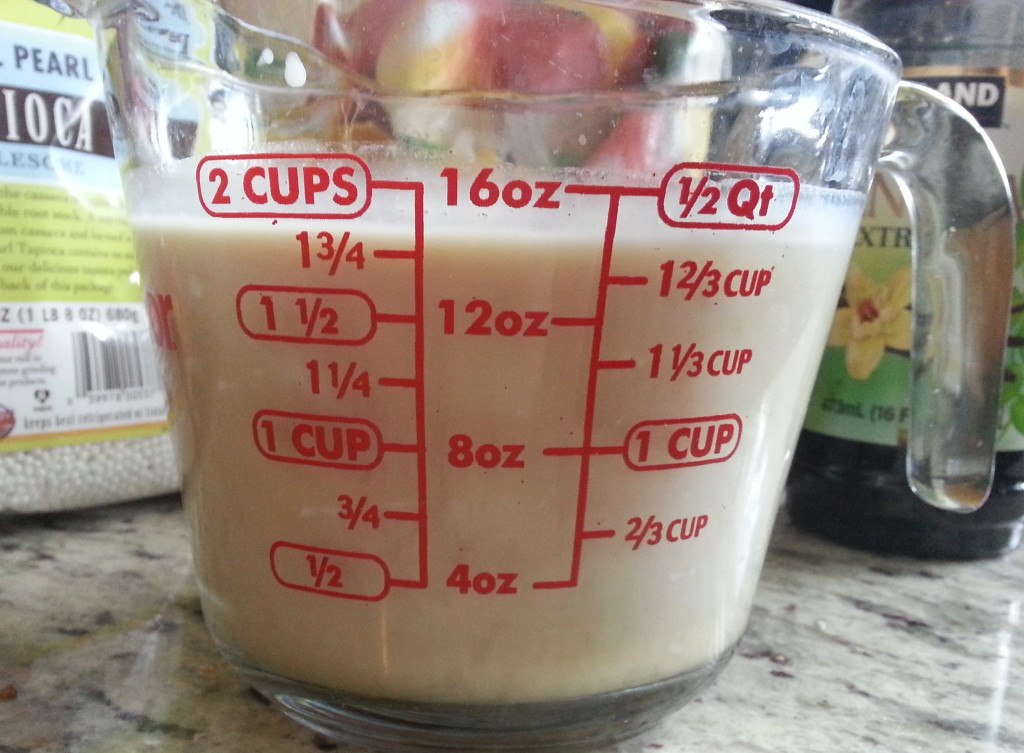
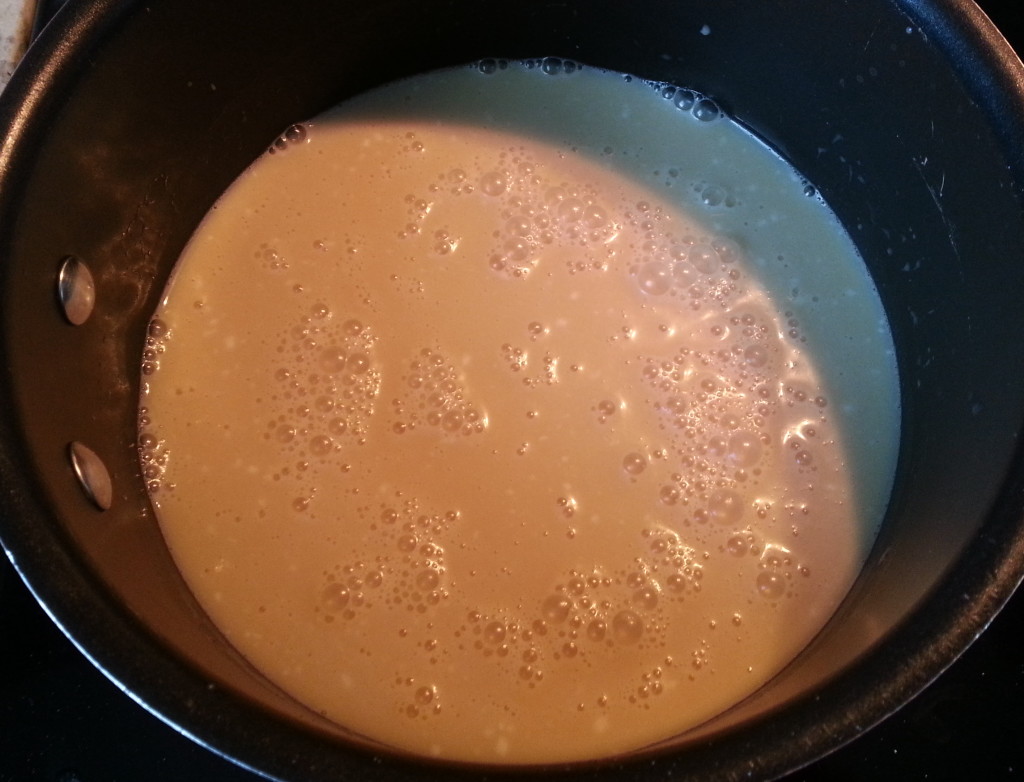
  • Place coconut milk, almond milk, maple syrup, salt, ½ cup of water, tapioca pearls, and egg yolk (if using) in a medium saucepan. Mix to incorporate ingredients and let sit on stove top – no heat or cooking yet – for 20 minutes.
  • Turn burner to medium-high heat to bring pudding mixture to a boil, stirring occasionally.
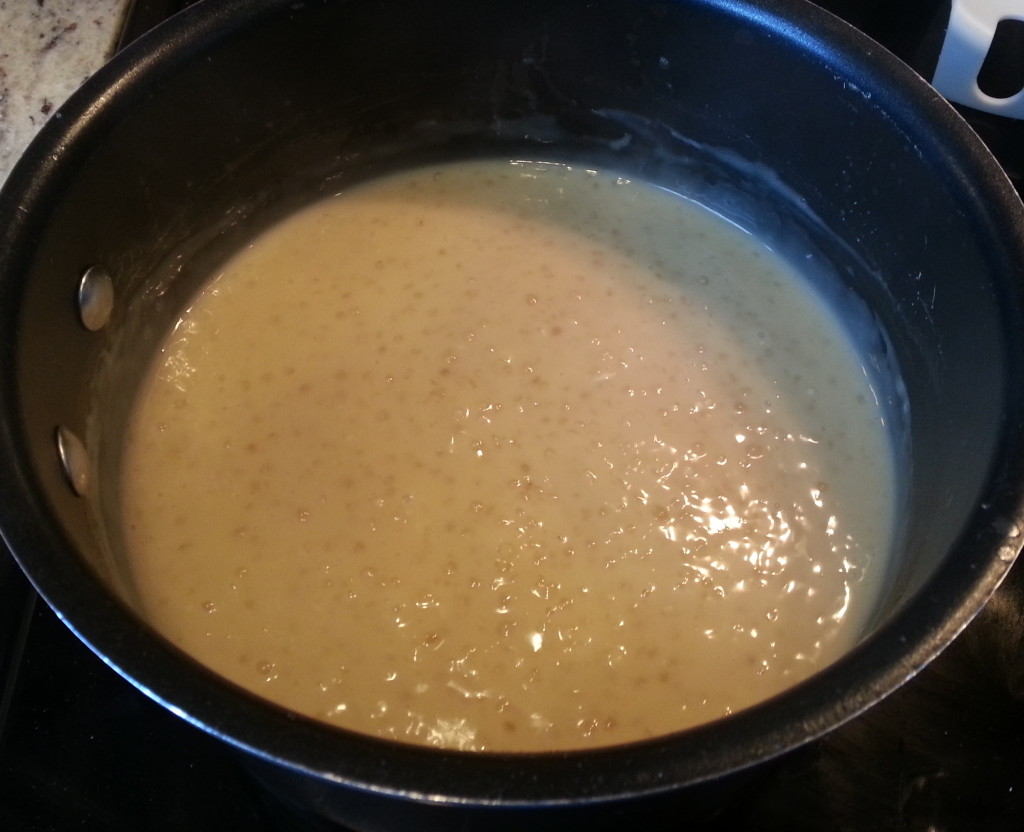
  • Once it boils, turn burner down to low heat and allow to simmer for about ten minutes or so, until it thickens and the tapioca pearls become translucent. Add more water from the remaining ½ cup if it gets too thick.
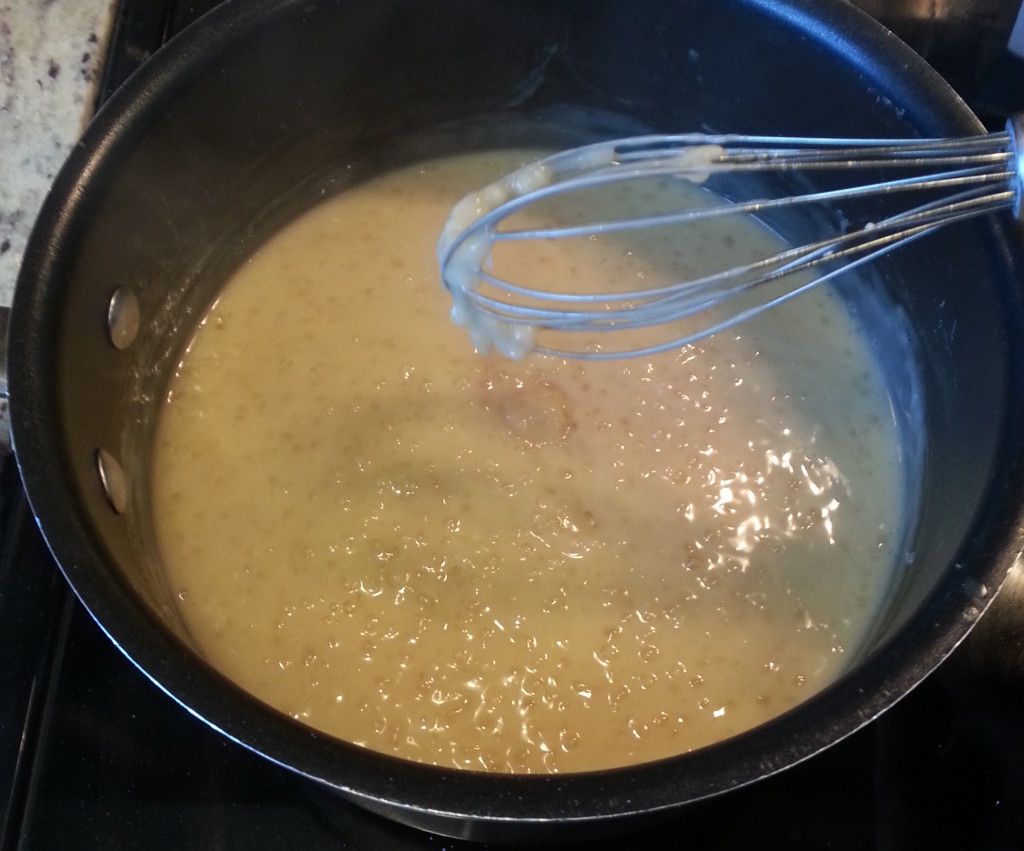
  • Add mangoes and cook until mixture begins to simmer again, about 3-5 minutes.
  • If using egg, whip egg white in a small bowl (or the measuring cup) with the sugar/sweetener. Temper this mixture into the saucepan by folding 1-2 tbsp of the hot pudding mixture into the egg white/sugar mixture. Do this at least three times before pouring the egg white/sugar bowl mixture into the saucepan. Then allow pudding to cook another 2-3 minutes in saucepan.
  • If not using egg, simply mix the sugar into pudding on stove and cook 2-3 minutes.
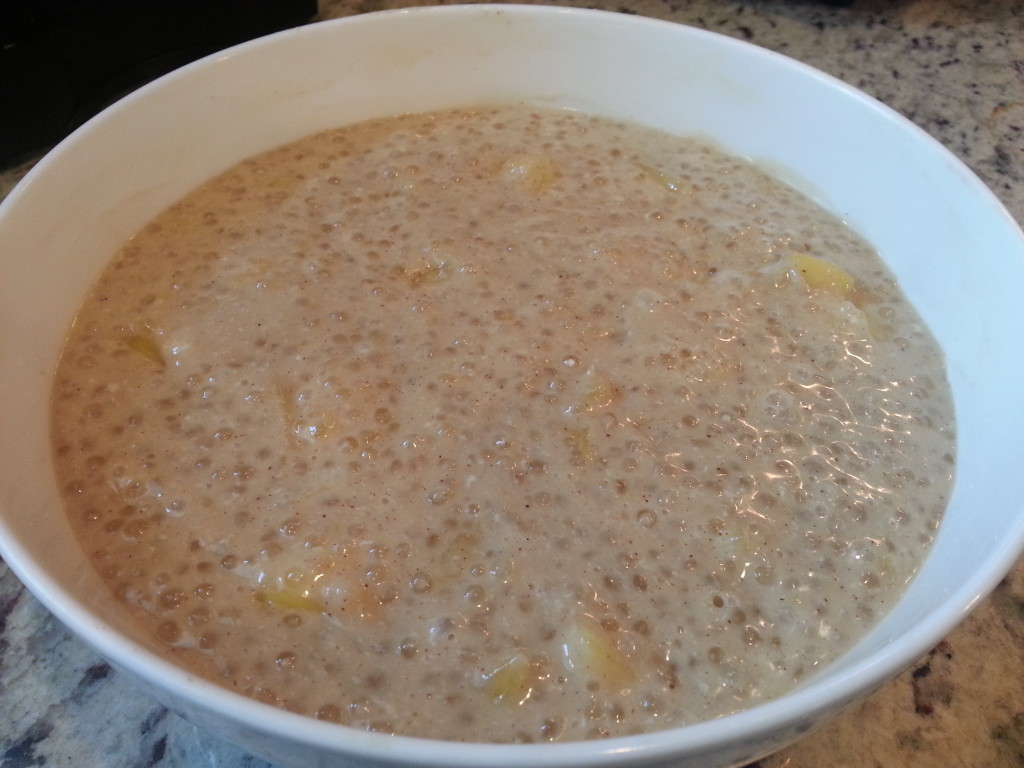
  • Pour into a serving bowl and add vanilla and cinnamon. Mix well.
  • You can serve this warm from the oven or cover it and refrigerate up to 5 days for a cool dessert. It’s really delicious both ways (and thickens even more as it sits). It’s really presentable when served with cinnamon sticks (as shown in pics).
  • Enjoy! :)


20151226_125449


20151226_125711


20151226_130004


20151226_130510


20151226_133803


20151226_133850


20151226_135828


20151226_192417

Classic Sweet Potato Casserole with a twist (RECIPE) – Dairy free, Vegan, Delicious!

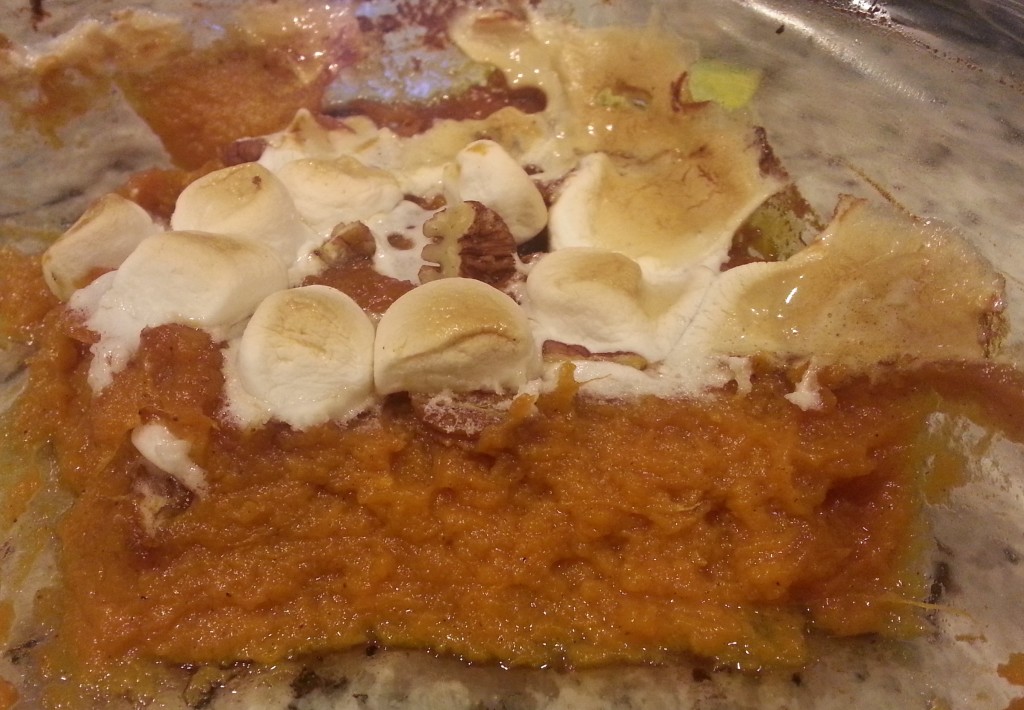
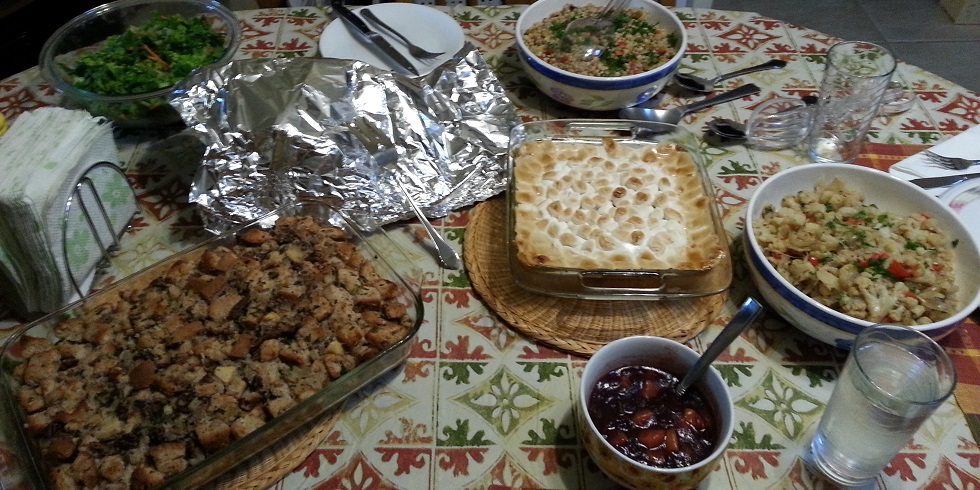
Did you know that the delicious and sugary Thanksgiving dish we know and love – the sweet potato casserole with browned marshmallows on top – was created by the marshmallow lobby in the early 1900’s? (You can learn a little more here.)

20151126_164036

I know, that may slightly tear away some magic from this classic dish. But the fact is, so many popularized, American foods that aren’t actually nutritious or beneficial – such as marshmallows – have simply become what they are due to smart advertising. Instead of getting too into the psychology and economics involved in the food industry (and further crapping on anyone’s marshmallow-loving parade), let’s just learn a little bit about marshmallows and where they came from.

Originating in ancient Egypt, marshmallows were a honey-sweetened candy made using the sap from the marshmallow root plant. It was soft and chewy, and used medicinally for ailments like sore throats.

Fast forward a few hundred years to the 19th century, and the labor-intensive methods of extracting marshmallow root sap made manufacturers come up with new processes (and involve new ingredients) which brought us to how we know the marshmallow today – as a light, fluffy, campfire treat which also tops the holiday sweet potato casserole.

Today’s version of the confection no longer contains the source ingredient of it’s name – marshmallow root – but instead, it is made up of a stabilizing protein such as gelatin (or agar, in Vegan versions) and sucrose (often with high fructose corn syrup).

20151205_235408

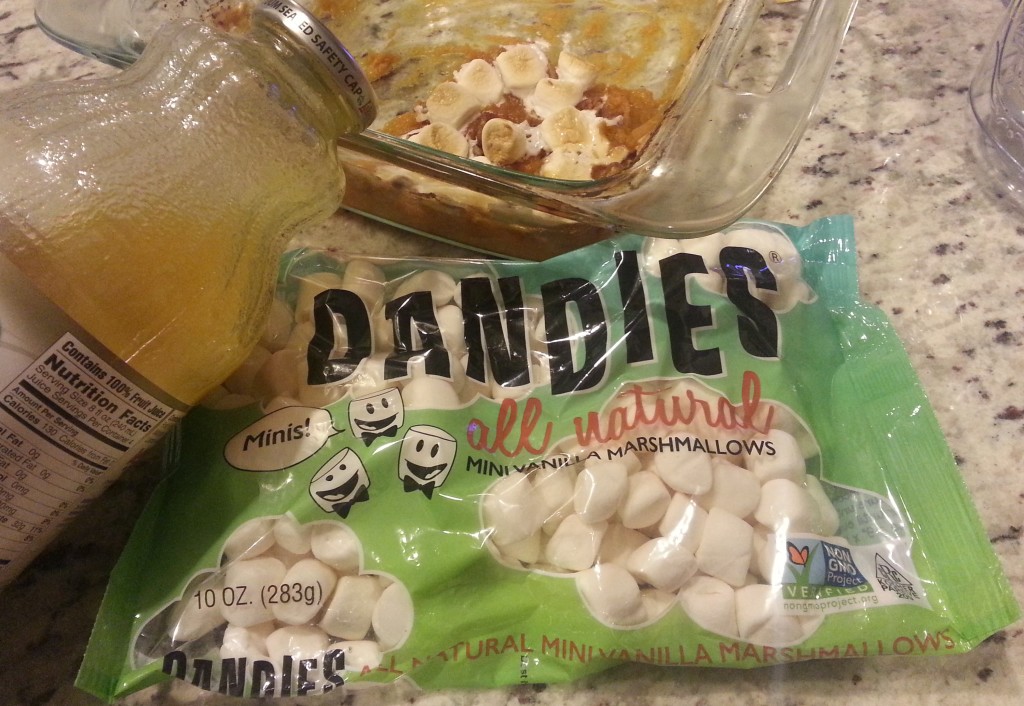
That said, there is nothing wrong with incorporating the better quality versions of marshmallows when making this crowd-pleasing dish once or twice a year. I use Dandies mini marshmallows, which contain no corn syrup, no gelatin, and no genetically modified ingredients. And, yes, they taste EXACTLY like your classic, name brand marshmallows – if not better.

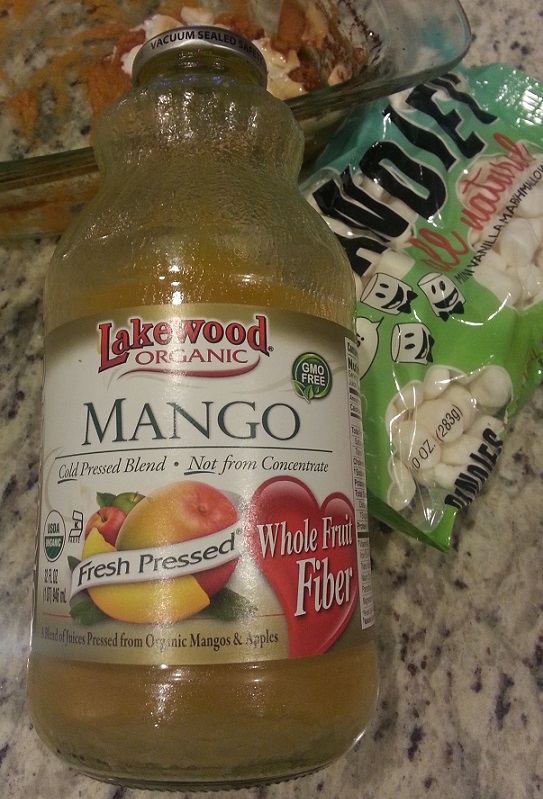
As for the secret ingredient that gives this casserole a twist? Well, that would be mango juice of course.

20151205_235356

Most “classic” recipes call for heavy cream, which is meant to contribute creamy richness. It doesn’t really alter the flavor, but it does bring in a LOT of unnecessary fat and calories. You won’t find heavy cream or ANY dairy within this recipe, which has been a hit at many-a-holiday-dinner time and time again.

A Helpful Hint: If you choose go to back to your traditional sweet potato casserole recipe after trying this one (dare I say, doubtful?) try substituting canned coconut milk for your heavy cream. Though it will not lessen the overall calories or fat content, it will maintain the same creamy consistency and add a complimentary touch of flavor. All while being more plant-based friendly and allergen free.

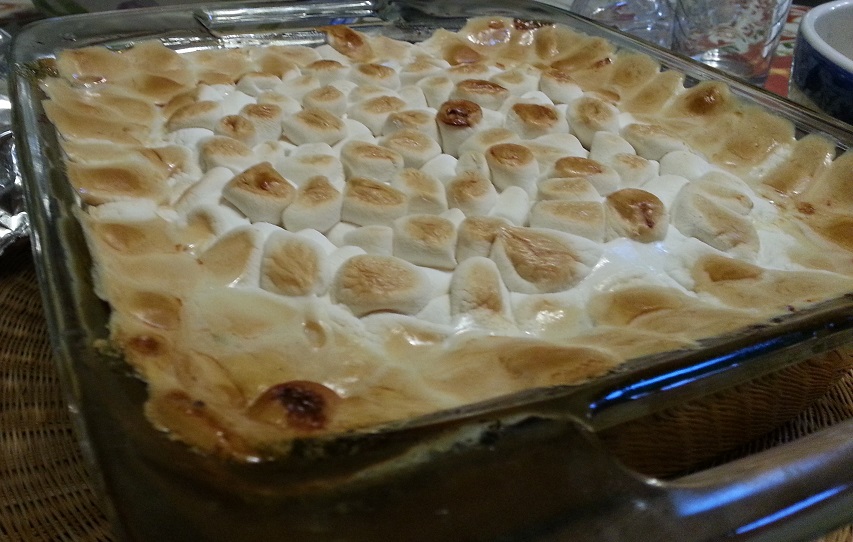
If you just want to make a great sweet potato mash, you can stop before step 4 below and enjoy as is. It is just as delicious (and plenty sweet) without the marshmallow topping!

Sometimes the deliciousness can't wait for a photo opp, as shown here.
Sometimes the deliciousness can’t wait for a photo opp, as proven by the devoured portion above.

CLASSIC SWEET POTATO CASSEROLE RECIPE (with a twist)

  • 3 lbs Sweet Potatoes (about 4 large or 5 medium spuds)
  • 1 tsp. pure vanilla extract
  • 1/2 cup mango juice/nectar *I’m sure pineapple or orange juice would work, too… but try to find mango!
  • 2 Tbsp. coconut sugar or light brown sugar
  • 1/2 tsp. ground cinnamon
  • 1/4 tsp. sea salt
  • 1/2 cup pecan halves, chopped
  • Half a bag (5 oz.) of quality marshmallows *I use homemade, locally made, or Dandies mini-marshmallows
  1. Preheat oven to 450 degrees F and line a baking sheet with tin foil.
  2. Wash the sweet potatoes in the sink and pat dry. Pierce the tops of the potatoes with a fork, 2-3 times, before placing (holes up) on the baking sheet. Put in the oven for about 45-55 minutes, until sweet potatoes are fork tender and syrup begins to ooze out from the holes. Remove from oven and let cool until they aren’t too hot to be handled (usually 15-20 minutes).
  3. Lower the oven to 375 degrees F. Grab your 8×8 glass baking dish (metal is fine too, I’m sure – and 9×9 would also work). Peel the potatoes, putting the yummy orange flesh straight into the baking dish. Mash well with a potato masher or large fork. Add the vanilla extract, mango juice, sugar, cinnamon, and sea salt. Mash and mix together until all incorporated.
  4. Use a spatula or the back of a spoon to even out top of the mash. Sprinkle the chopped pecans evenly all over the surface. Then do the same with the marshmallows.
  5. Place on center rack in oven and bake at 375 degrees F for about 25 minutes, or until marshmallows begin to turn golden brown. Remove, let cool slightly, and enjoy!

*You can also make the dish ahead of time. Simply cover the mash in the baking dish after step 3 and refrigerate for up to 2 days. When ready to bake, remove from fridge for about 20 minutes to take the chill off and preheat the oven. Then add pecans and marshmallows, and bake as instructed above!

20151126_164045
Impromptu dinner paparazzi – starring the BEST sweet potato casserole!

Amazing Client Progress, Why the Scale Sucks, and How to Gauge Progress Without It

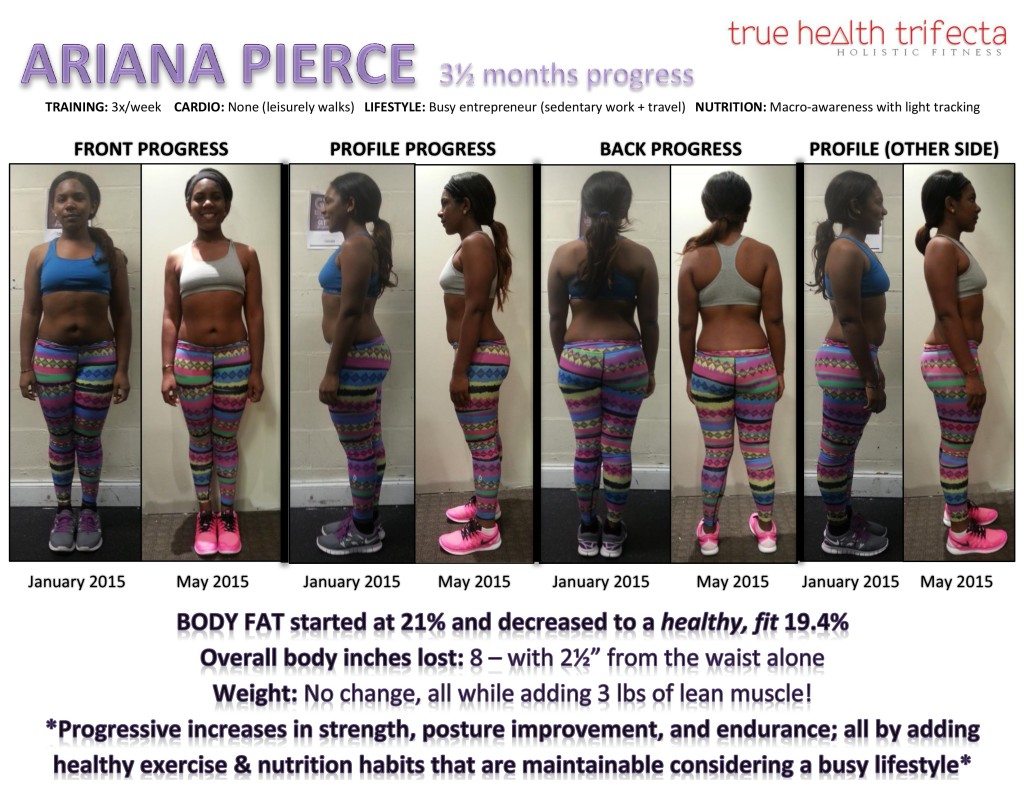
Just taking a moment to share some amazing progress from a lovely client. This girl is busy, just like the rest of you… traveling, working, an active entrepreneur with multiple thriving businesses, and – like most people – she’s not about to live & breathe fitness with hours of working out and a strict diet. That’s why we created a workable plan that allowed her to continue with her lifestyle AND achieve results. Flexible eating, no extreme diets or excess cardio or even daily training, better self awareness and maintainable day-to-day tweaks.

Ariana 3month progress 2015-page-0

One thing that I tell clients looking to transition into a lasting healthy lifestyle is that you should start with the BARE MINIMUM that it takes to see noticeable change. That way, you are more likely to keep continuing and progressing without burning out or backsliding into former, unhealthy habits. Going balls to the wall from the start is a great catalyst for some as results happen fast; but would you rather see immediate progress and bounce right back… or practice just a little patience, trust the process, and feel and see on-going success?

The truth is, with strategic nutrition you can change your body composition to whatever you envision. At this point, I can easily calculate and provide most any individual with the nutritional and exercise means to do so. But the most important part of anyone’s health & fitness journey is remaining as balanced as possible with minimal stress and while maintaining (and increasing) happiness.  Providing knowledge on how to obtain that is my priority when coaching clients towards their optimal fitness (and one of the reasons I do not coach for physique competitions as well as rarely toss out listed-food “meal plans” like other trainers may).

Something else I want you to notice about her stats – ladies, especially – is that her scale weight DID NOT CHANGE yet her physique is obviously tighter, smaller, and more fit. Often, clients come in who are simply “skinny fat” or carrying slightly higher body fat than they feel comfortable in. However, they are far from overweight (never mind, obese). Let me tell you, a large part of my client base has been said types of college-aged females and the number on the scale is like their holy grail gauge of success. This kills me, because that screwy little number can dictate someone’s day, their self-worth, their self-esteem, and their overall confidence when it is actually a horribly inaccurate gauge of true fitness, health, and progress.

Try this out: Move your scale from against the wall of the bathroom floor to anywhere else in the house, and watch it vary by 3-4 pounds (yes, really… I have people test this all the time to prove this point)!

This is why another priority of mine is to teach my clients that how you feel – both in and out of your clothes AND in your mind – and body fat percentage are what matter. In non-overweight clients who are within the criteria I mentioned above, we gauge progress by waist size, overall inches lost (or gained if muscle), clothing sizes, photos and body fat calculations. I solely obtain someone’s scale weight in order to calculate their body fat percentage.

Speaking of body fat, you may have heard that popular fitness phrase that “muscle weighs more than fat”. Well, I’m here to tell you muscle does not actually weigh more than fat does. Think about it: a pound is a pound regardless to what you’re weighing. Saying muscle weighs more than fat is like saying a pound of baseballs weighs more than a pound of feathers… when, really, they both weigh the same: a pound.

What the popular fitness quote is really trying relay is that muscle tissue is more compact – or denser – than fatty tissue; meaning it just takes up less space. So, for example, my client shown above lost 3 lbs of pure body fat while gaining 3 lbs of muscle. That is why although her scale weight remained the same, she lost inches and now fits into a smaller dress size. Simply, her body composition is much leaner and more compact thanks to less fat and more muscle.

I hope that more clearly explains how even if your body weight may not change, you are still potentially making progress in the right direction (especially if you’re incorporating any strength training on your fitness journey).

In a nutshell, if you are not clinically overweight or obese and simply feel you need to “lose a few pounds” – please, PLEASE do not waste your time by diminishing any amazing progress, body reshaping, fat loss, confidence, potential for a great day, or value in your efforts because of that ridiculously wonky number on a stupid electrical device. Pick a goal pair of jeans or dress and try it on each week or two to help you gauge which direction you’re going.

Back to the original subject at hand, I’m not going to say that slow-and-steady always wins the race because let’s be honest – that’s not always true. However, I will tell you that if quick-fixes haven’t worked for you in the past (and by worked I mean you’ve maintained the results you achieved), it’s time to reflect on your daily habits and lifestyle. Add in one thing at a time – like a walk after dinner, one large salad a day, going to the gym twice a week, or swapping soda for sparkling green tea – and stay consistent with it. Once you feel like it’s almost second nature, add another new, healthy habit into your routine.

With that, stop idolizing the scale and the number it flashes every time you hop on. To gauge your progress, choose a pair of jeans or a dress to fit into for a night on the town (making your goals fashionable AND functional!) instead of anxiously depending on that little machine you just hop on for five seconds. If you do regularly weigh yourself only to feel discouraged most of the time, I challenge you to get rid of your scale and trust the process of adding health-conscious habits for a solid month. I guarantee that within a couple of weeks, you will notice increased mood and confidence (and even progress!) plus less stress simply by removing that morning-happiness-dictator from your routine… because you will finally be able to dictate your happiness again.

The BEST and Easiest Banana Pancake Recipe (using Manzano or “Apple” Bananas)

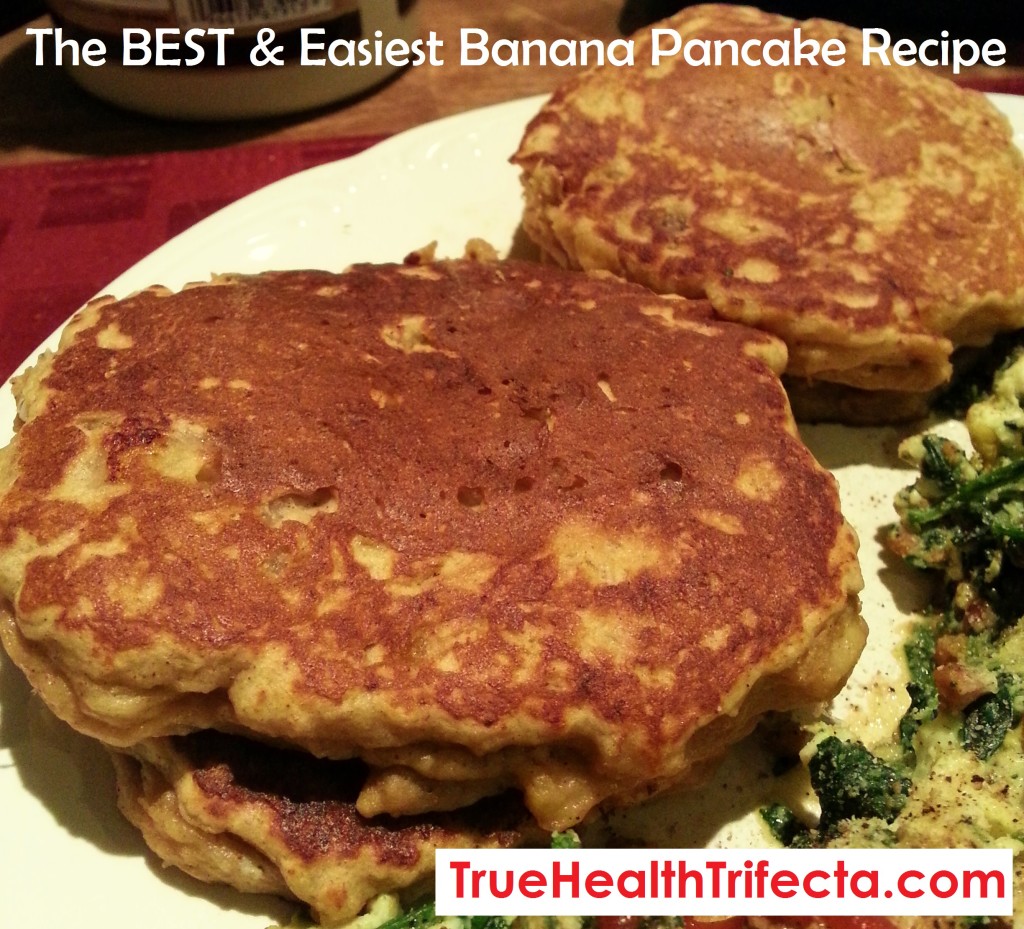
These amazing, healthy, easy-to-make pancakes were tweaked to perfection after about a week of making them daily… for dinner… because sometimes, week long pancakes-for-dinner-kicks just happen. And when they do, you just have to go with it.

Thank goodness I hopped on this nightly breakfast train, because by the end of the week I can hands-down say that I perfected this simple little recipe that I am now super excited to share!

It all started off with a little trip to one of the local Asian markets, where I always make sure to pick up at least one random fruit or veggie that I wouldn’t necessarily find in a typical grocery store.

Enter: These little guys…

Not my photo, but totally my little Asian banana find.

When I got them from the store, they weren’t as yellow as the photo above (with some black spots and edges). As one who is well versed on the ideal ripeness of regular bananas, they seemed ready to enjoy! But, as I soon found out, these bananas were nothing like regular bananas (except appearing like a mini-version). They were not even close to ripe and actually closer to tasting like a starchy, rough, unpalatable banana fraud.

I then did some research and realized that these particular bananas are ripe when the peel is about black – similar to plantains. So, a week or so later, I tried another one. And I finally understood what others had said about these lil’ nanaz tasting like an apple and banana had a baby with a hint of strawberry. That is pretty much exactly what they taste like – and it’s amazing.

So, lessons to learn here:

  • Baby-looking bananas need to be black (or nearly black) to be the most palatable.
  • They are also “starchier” with more bite than regular bananas, even at their ripest.
  • They taste like an apple and banana had a baby, and that baby only eats strawberries.
  • Most importantly, they’re dang tasty and add the perfect non-mushy-yet-banana-licious texture and flavor to the world of banana pancakes.

Back story over, onto what matters: the recipe!

20150213_150936

The BEST and Easiest Banana Pancake Recipe

(using Manzano or “Apple” Bananas)

Ingredients:

4 manzano bananas (ripe and black), mashed – about 150g *You can use 2 regular bananas equaling the same amount, but this may result in less dense/mushier pancakes
1 egg (or flax substitute using a 1:3 Tbsp. ratio of ground flaxseeds to water) *if using regular bananas and flax substitute, do not add water and use 1 Tbsp. ground flaxseeds only
1/2 Tbsp. coconut oil
Scant 1 tsp vanilla extract
3 Tbsp. quinoa flour
1/2 scoop Rawfusion Protein Powder in Vanilla (or your favorite plant-based protein powder; using whey will change pancake consistency)
1/2 tsp baking powder
1/4 tsp baking soda
2 tsp (small splash) apple cider vinegar
Good pinch of salt
1/4 tsp ground cinnamon

Directions:

  1. Mix mashed bananas, egg/flax egg, vanilla extract, coconut oil, and cinnamon together.
  2. Add dry ingredients and apple cider vinegar, and whisk or mix until all incorporated.
  3. Grease skillet lightly at medium/slightly before medium heat (level 5 or 250 degrees).
  4. Spoon 1/4 cup or so of batter into pan and spread out eventually.
  5. Let cook 2-3 minutes until edges look dry and top just begins bubbling, flip and cook another 2 minutes.
  6. Stack up and enjoy! (Makes four 5-inch pancakes, or one serving)

These can also be frozen after cooled, and reheated in a toaster oven! Practical AND tasty!

Are Fatty Foods Addictive? Do you eat ice cream? Must watch! (VIDEO)

It’s been a while since I’ve posted an update, blog, recipe, other fun-filled reads… BUT, this.

THIS.

Why am I choosing to share this video out of the hundreds of other videos, studies, essays, and research I’ve come across proving the message that is being put across? It’s pretty simple, really.

  1. It’s short enough to get and keep your attention for the whole thing.
  2. It’s JAM-PACKED with legit, clinical studies and information proving the point.
  3. It relates to a common struggle MANY OF YOU have expressed, and are unsure why.
  4. It’s quickly impactful, incredibly relevant, clear & concise…

Basically, it’s just good.

If you watch one 5-minute video this week, or this year… It better be this one. I’ll admit, that may even be including my own videos for you guys! There is a lot explained in this short video that can be a huge eye-opener to many people (which, in turn, will help you MAKE and STICK to your healthy choices):


What do you think? Does any of thing ring true to you? If you’ve gotten my Nutritional Cheat Sheet, you will see my notes regarding single foods that are both high in fat and carbohydrates (think ice cream, fried anything – especially sweets, most anything sugary and processed, even peanut butter, to name a few).

Hint: As you know by watching the above video, you want to steer clear of such apparent deliciousness!

Let me know what you think about this beneficial lil’ video of education in the comments below; will this effect your food choices from here on out? Have you experienced any of the side-effects mentioned when it comes to dopamine or satisfaction? Discuss!

P.S. Lots of great updates coming soon including my first exclusive e-book, members-only recipe book, instructional videos, and more! Make sure to sign up to our mailing list for updates and don’t forget to browse around the place! :)

EASY, Go-To Protein Shake Recipes!

Common Question: How do I USE protein powder?

Depending on the type of protein powder (for the sake of simplicity, I will refer to the two more common comparisons: whey and plant-based), there is little difference when it comes to actual preparation and ways to enjoy.

Compared to whey, plant-based protein (like my favorite: RawFusion), tends to act more like a ‘flour’ when mixed or baked into different things. It is a bit thicker, slightly harder to blend, and can even be made into a pudding quite easily (similar to casein protein for anyone familiar with Casein Fluff). Whey, however (especially whey isolate), tends to become more gummy and liquid-like and would not suffice in a pudding-type treat. Due to this, it does blend into liquids or other foods, like yogurt, much faster and easier.

So in the case of consistency, plant-based proteins = thicker like flour; whey proteins = easier to blend into liquid. Regardless, both are great for blended smoothies. And since most clients I have worked with are in need of a convenient way to use protein powder as opposed to becoming the next Master-of-Creative-Culinary-Uses-For-Protein (guilty, as proven by the video at the bottom of this post), I will share a couple of my favorite go-to protein smoothie ideas that are easy, delicious, and nutritionally-sound.

These are great any time of day: breakfast, an hour or so before your workout, after your workout, or literally any time. Sure, there are certain benefits timing-wise if you want to get more detailed with the science of nutrient absorption versus activity and a whole slew of other metabolic factors, but what ultimately matters is simply getting into the routine of having additional protein and feeding your body favorable nutrients in general. Trust me. Do not over-complicate things, especially with new routines. Focus on the grand scheme rather than minute details. Have your shake or smoothie where it fits best for you and your schedule.

Remember: it is best to start with small and simple habits!

Protein Mocha Frappuccino

  • 8-10 oz. unsweetened almond or coconut milk
  • 1 scoop Protein Powder of choice (or 2 for active men) *I use RawFusion
  • 1 Tbsp. Instant Coffee Granules
  • 1 Tbsp. Unsweetened Cocoa Powder *omit if you’re using Chocolate-Flavored Protein
  • 1 Handful of Ice
  • 1 Tbsp. Chia Seeds OR 2 Tbsp. Ground Flaxseed
  • Optional: 1 tsp. vanilla extract, or any extract of choice! Coconut, Mint, Orange, Banana.. tons of fun flavors out there! Be creative!

Blend in blender and enjoy!

Fruity Protein Smoothie

  • 8-10 oz. unsweetened almond or coconut milk
  • 1 scoop Protein Powder of choice (or 2 for active men) *I use RawFusion Vanilla
  • A big handful of raw spinach
  • 1 Cup Frozen Berries
  • 1 Tbsp. Nut Butter, Coconut Butter, Chia Seeds OR 2 Tbsp. Ground Flaxseed
  • Optional: 1 tsp. vanilla extract, or any extract of choice! Coconut, Orange, Banana… get creative!

 Blend in blender, sprinkle some cinnamon on top, and enjoy!

*For those seeking a trusty, inexpensive little blender, I always suggest this Hamilton Beach Single Serving Blender with Travel Lid. It is easy to find (sold at Wal-Mart or Amazon.com for $12-14), blends your shake smoothly, lasts FOREVER (I’ve had mine for over 6 years, plus check out these reviews), and is great to keep at work and/or at home.

The great thing about smoothies is that you CAN very easily adjust and get creative according to your taste! Make it a Veggie Smoothie by adding in some cucumbers, celery, spinachMake it an Apple Pie Smoothie by using vanilla protein, cinnamon, a chopped apple (or even organic apple sauce), and some walnutsMake a Pumpkin Pie Smoothie by using pumpkin puree, vanilla protein, cinnamon, ginger, nutmeg, and some pecans… Don’t be scared to try new things! You’ll be surprised at some of the deliciousness you come up with.

For those who ARE open to becoming more creative with protein powder, try mixing it into some organic Greek Yogurt, or mixing it into cooked and cooled down oatmeal, or even making it into a pudding like I mentioned and using it as a dip or sweet cream sauce like I did in this recipe.

Want to get really fancy?

Check out this video recipe for Protein Marshmallows!

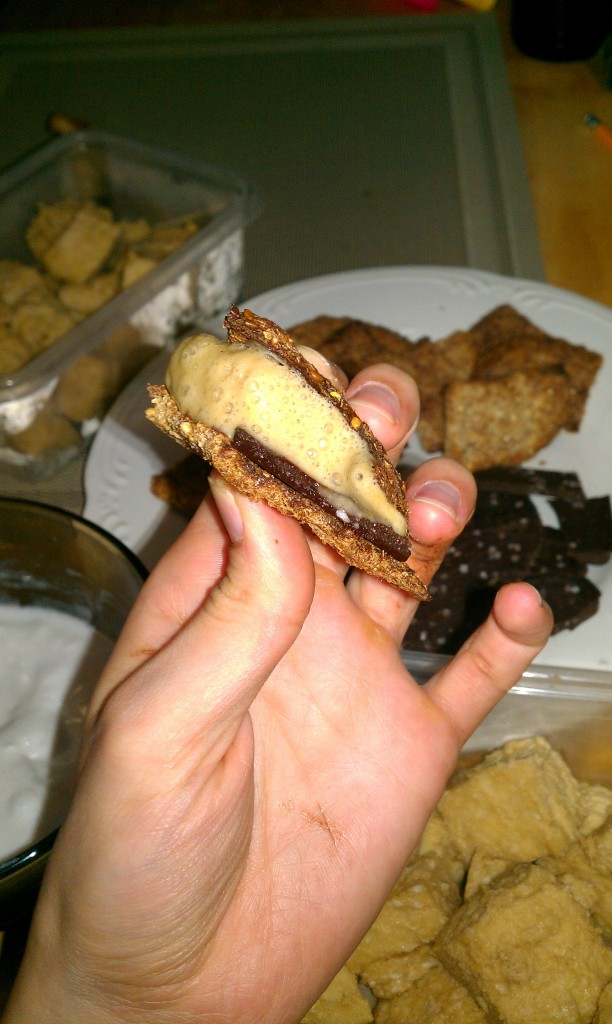
Coming soon: Recipes for both my easy, homemade chocolate bars and simple, sprouted grain “graham” crackers to use with the Protein Marshmallows for the delicious S’mores-From-Scratch as shown here…

Smores

Like I said, the possibilities really are endless! :)

Macronutrient Cheat Sheet now available!

Whether you are new to fitness and starting off your fat-loss journey, or you are playing with a macro-based form of nutrition and dieting (like IIFYM, or If It Fits Your Macros); or you want to learn more about the “categories” your favorite foods fall into in terms of Protein, Fat, Carbs, or Fiber; or you want to practice a sustainable way of figuring out portion sizes that doesn’t require you to carry a scale or measuring cups around (because, honestly, who wants to do that?!)… I am excited to share this with you!

Here is a little “cheat sheet” that I made specially for my clients, which is now available to all of you in the store!

This affordable, simple-to-follow Cheat Sheet will help you learn:

  • Numerous common different sources of protein, carbohydrates, and fats

  • Which common whole foods are natural combinations of proteins/fats or protein/carbs

  • General suggested serving sizes for men and women (that don’t involve measuring cups!)

  • General food timing suggestions for optimal progress or fat loss

  • Additional tips about fiber, greasy/junk foods, and seasonings

It has proven to be a huge help to many of you guys already, which makes me super happy to hear because I put a lot of thought and time into it for you all! I definitely encourage you to order up (it’s a full-size .PDF download you will gain access to once purchased), print it out, and keep on the fridge!

Shoot, print out a few and keep one at work and one in your wallet or purse, too. Look it over as a guide whenever you need to, and feel free to share it with friends!

THT Macro Cheat Sheet-page-0(1)

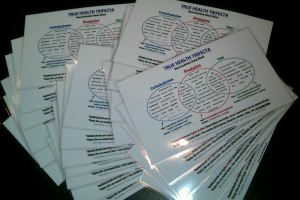
An even better idea (and how I provide these wonderful little things to clients in person) is to print your Cheat Sheet in half-page size and then laminate it at a local office supply store… this way you can circle or cross off foods with a dry erase marker, making it a compact re-usable grocery list!

IMAG1097-1

Whether you are just starting out towards your fitness journey with nutritional awareness or well on your way and in need of a handy guide to keep things in check, I hope this acts as a useful tool for you or someone you know! :)


Get yours here: Macro-Nutrient Cheat Sheet