Tag: healthy eating

RECIPE: Cilantro Lime Rice & Beans (better than Chipotle!) – Easy, Plant-based dish!

Everyone loves Chipotle (right?) and their simple yet delicious spread of Tex-Mex goodness.

But… let’s be honest. Cost-wise, they make a killing charging what they do for some of the most affordable types of food around. Namely, rice ‘n beans (or arroz y frijoles).

Even if you do skimp on the guac (which, if so, who ARE you?) eating at places like Chipotle often can definitely put a dent in your finances.

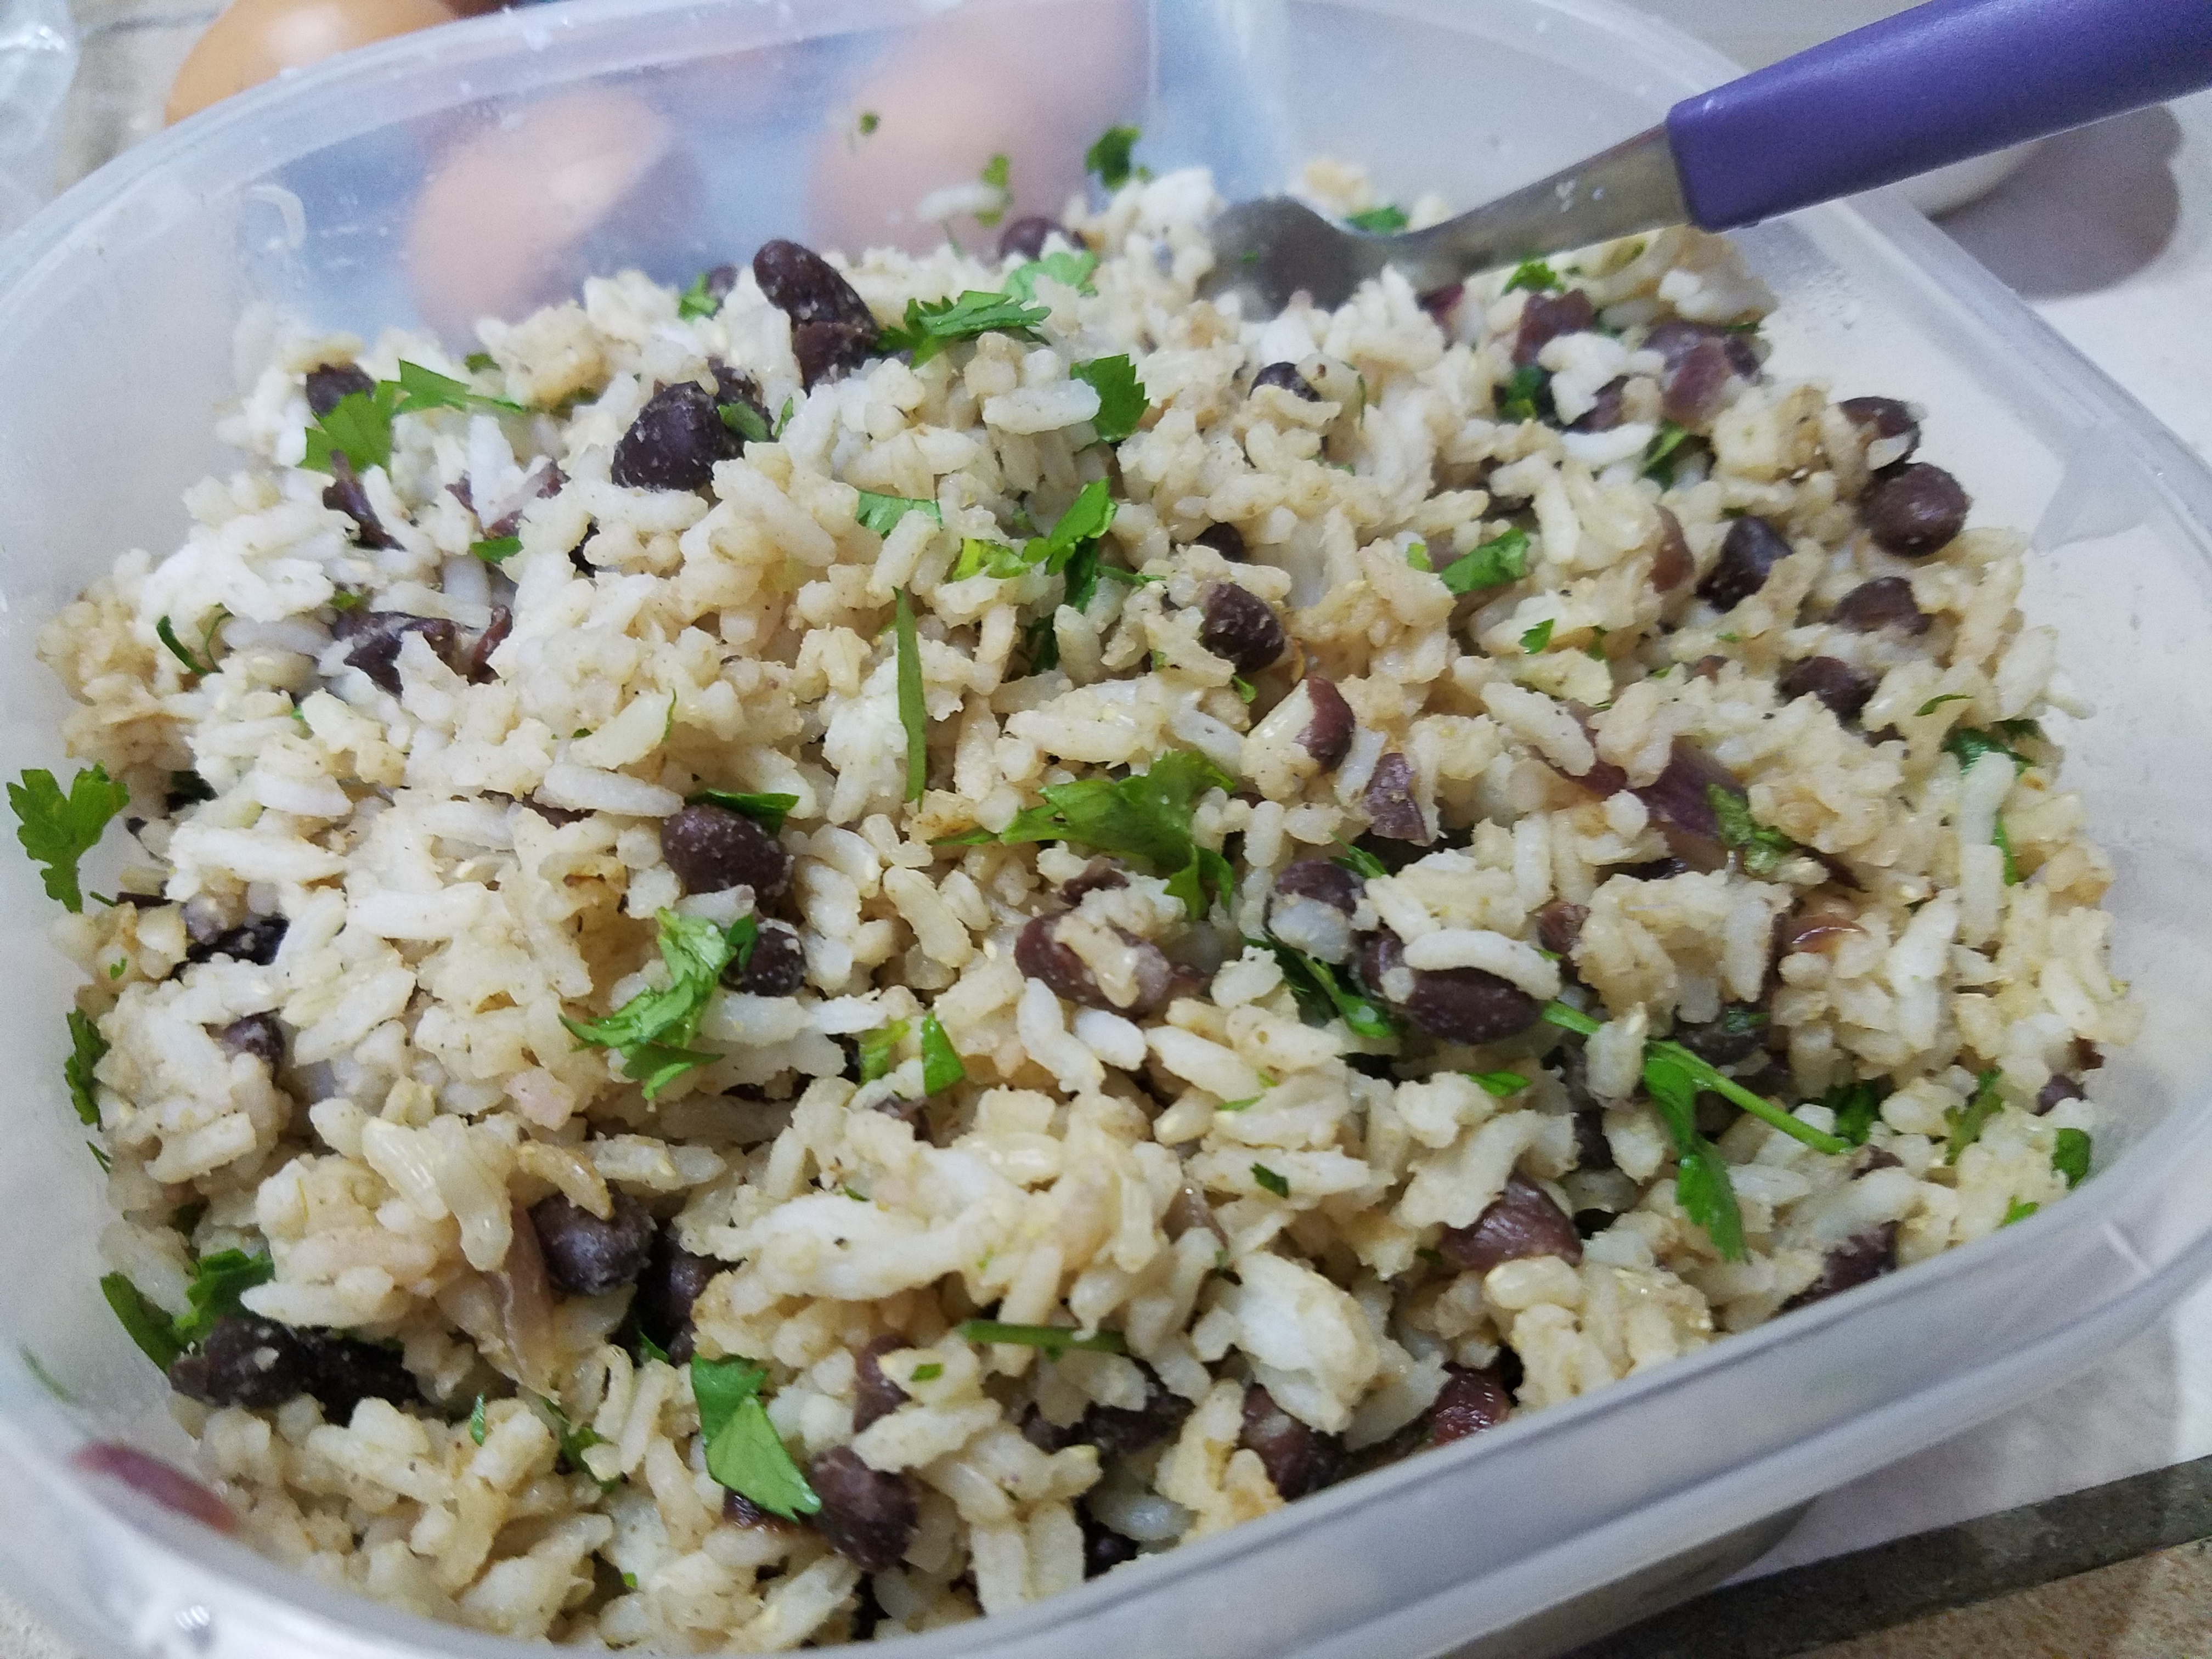
So, allow me to bring to you my HOMEMADE CILANTRO LIME RICE & BEANS (that are better than Chipotle).

I love me some rice ‘n beans, as do most people I know. Especially while traveling through Latin America, where gallos pinto – the traditional rice ‘n beans dish – is typically served with breakfast.. AND lunch.. AND dinner at times… I grew to love them even more rather than get tired of them.

I love this dish so much that there are at least 5 different, flavorful rice ‘n beans recipes I plan to share here on the blog (as well as helpful tips and advice for anyone who plans on traveling or living in places like Costa Rica).

It all starts with the two [obvious] key ingredients…

Arroz.

Y frijoles.

Now, if you don’t have the kitchen blessing that is a rice cooker, you’re still good to go. You can use a saucepan on the stove top. Yes, this may be the easiest, better-tasting, restaurant-replica recipe you have ever made.

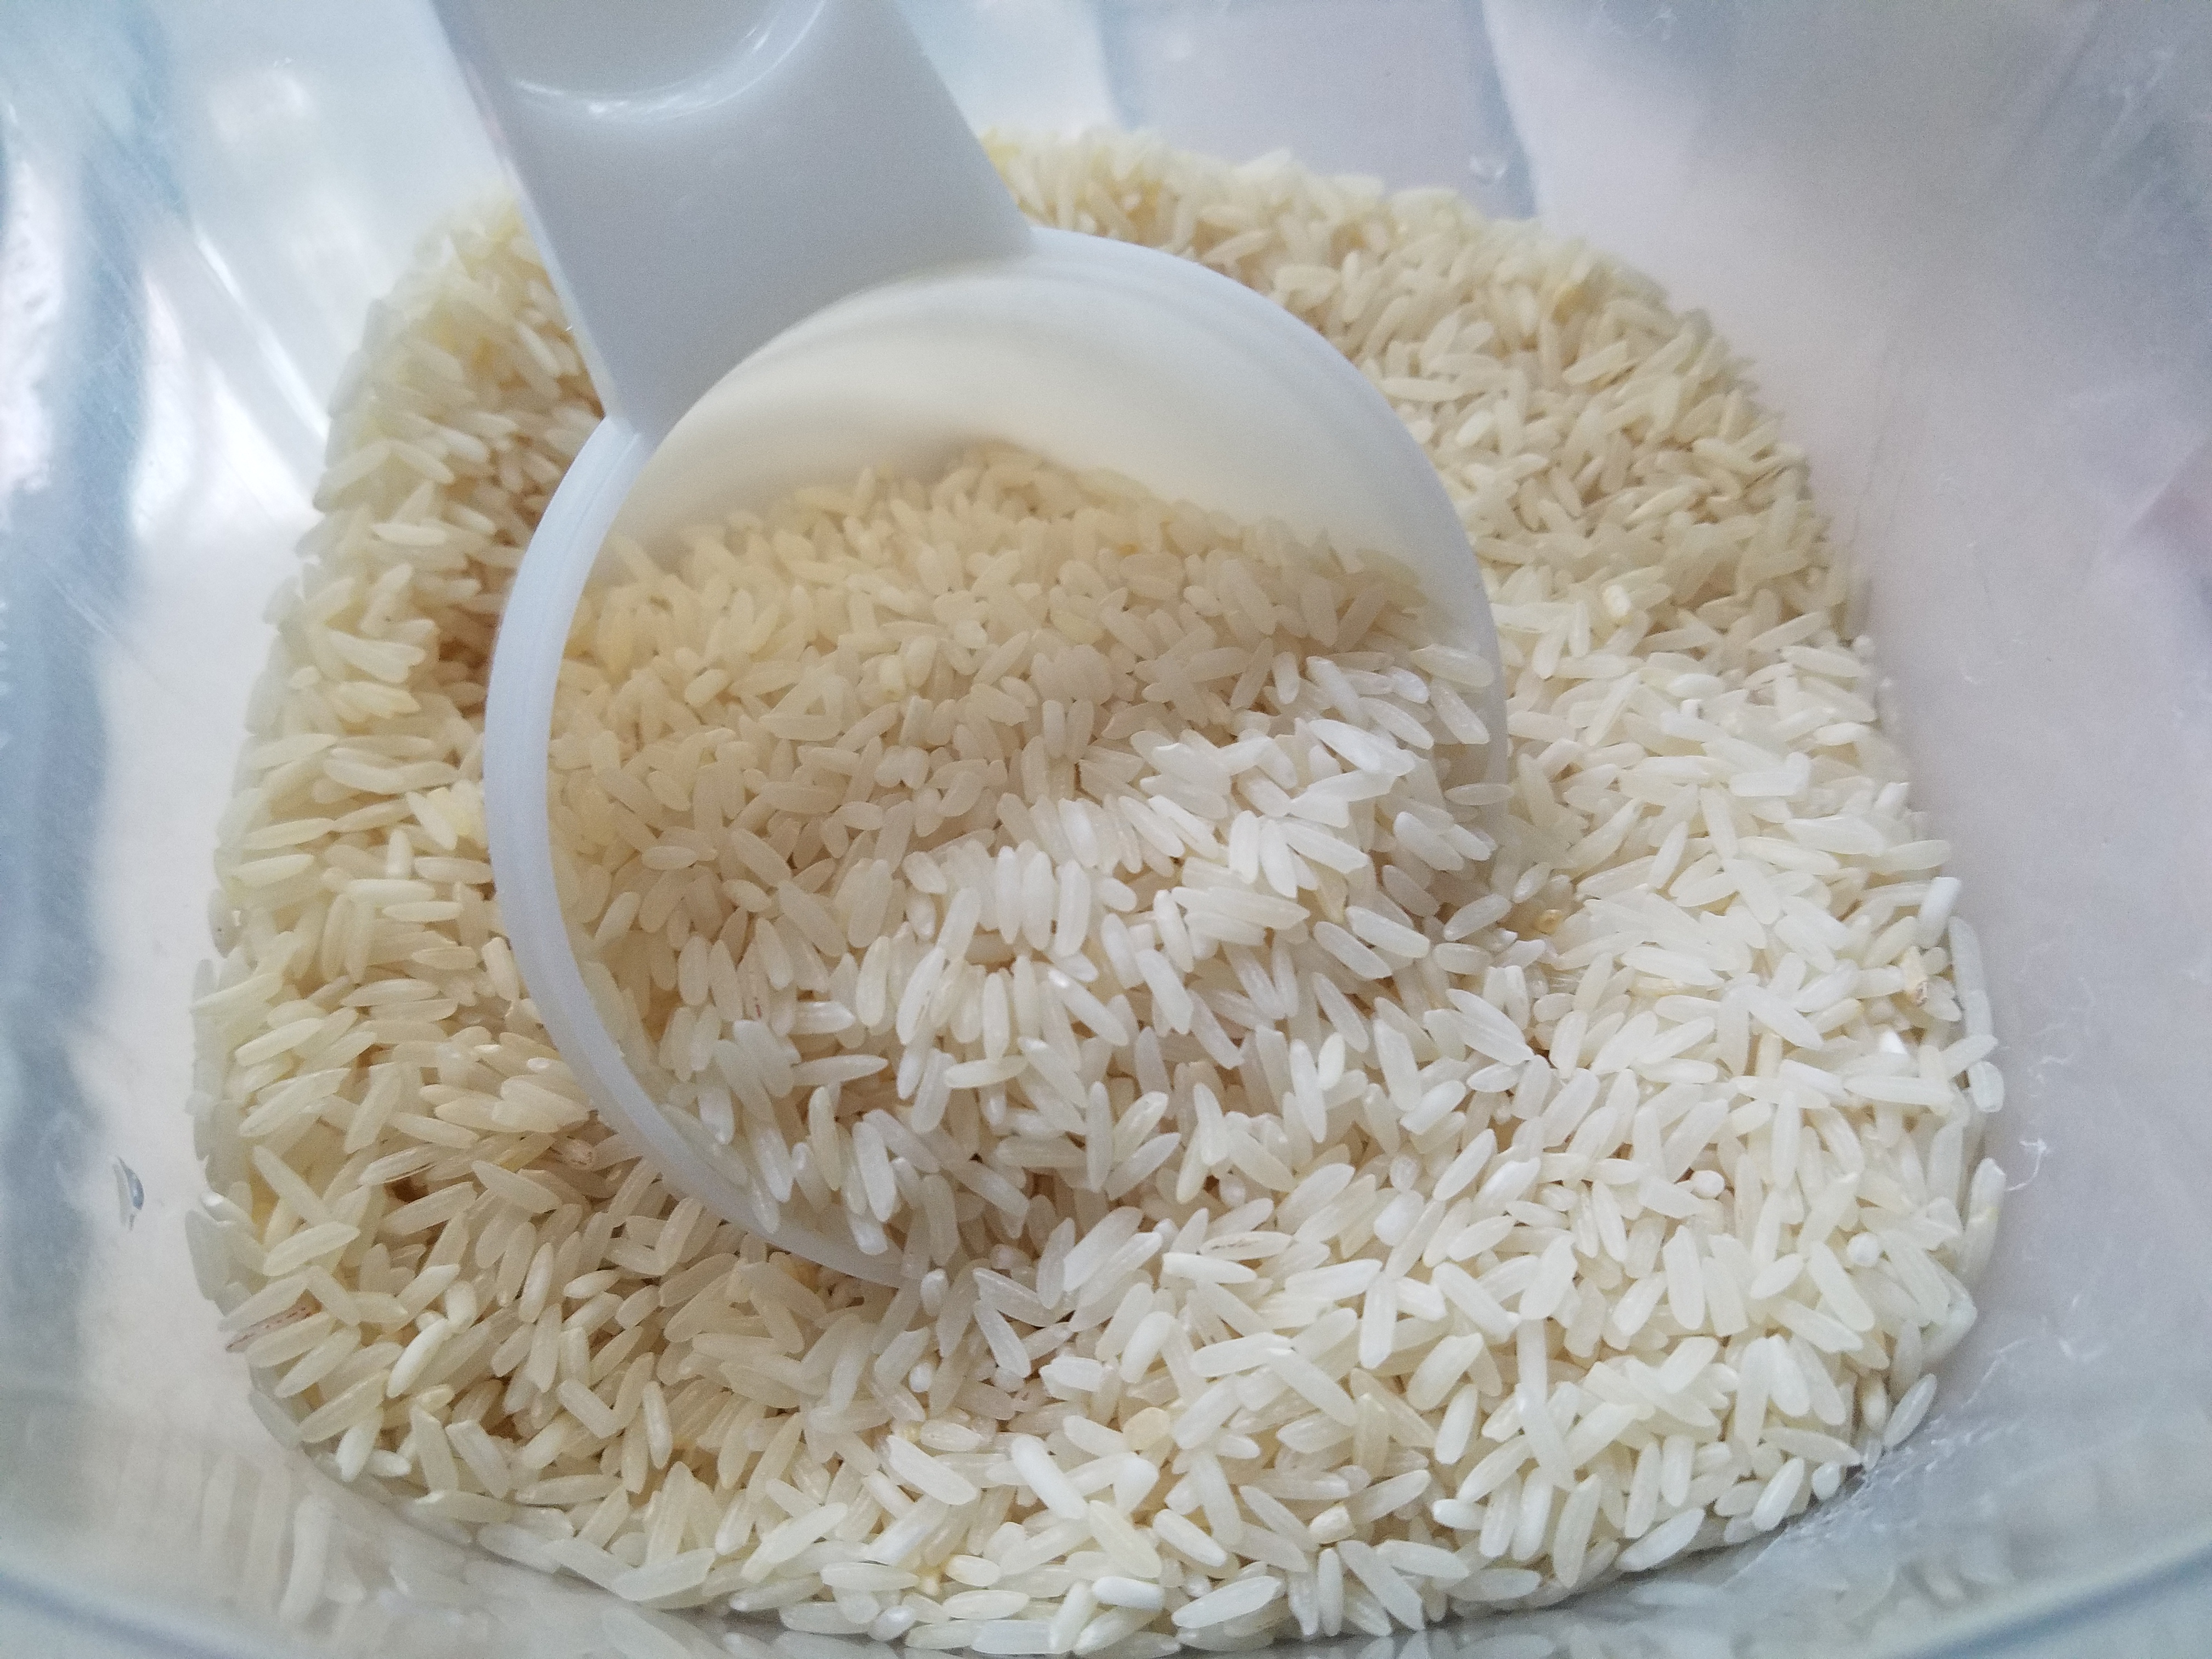
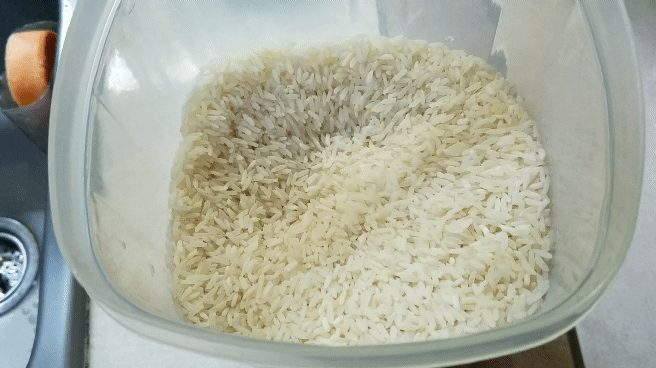
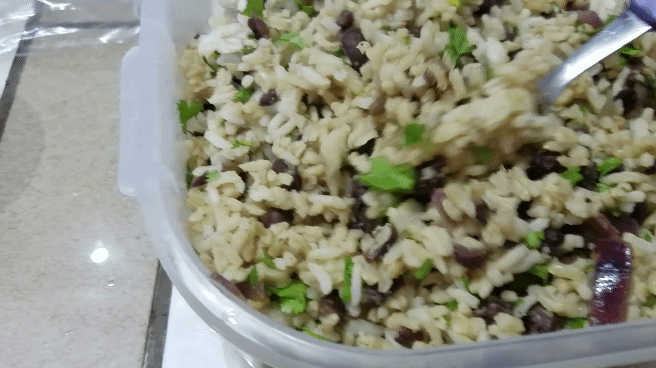
What kind of rice do you need? Whatever you have on hand. I had a blend of brown and white.

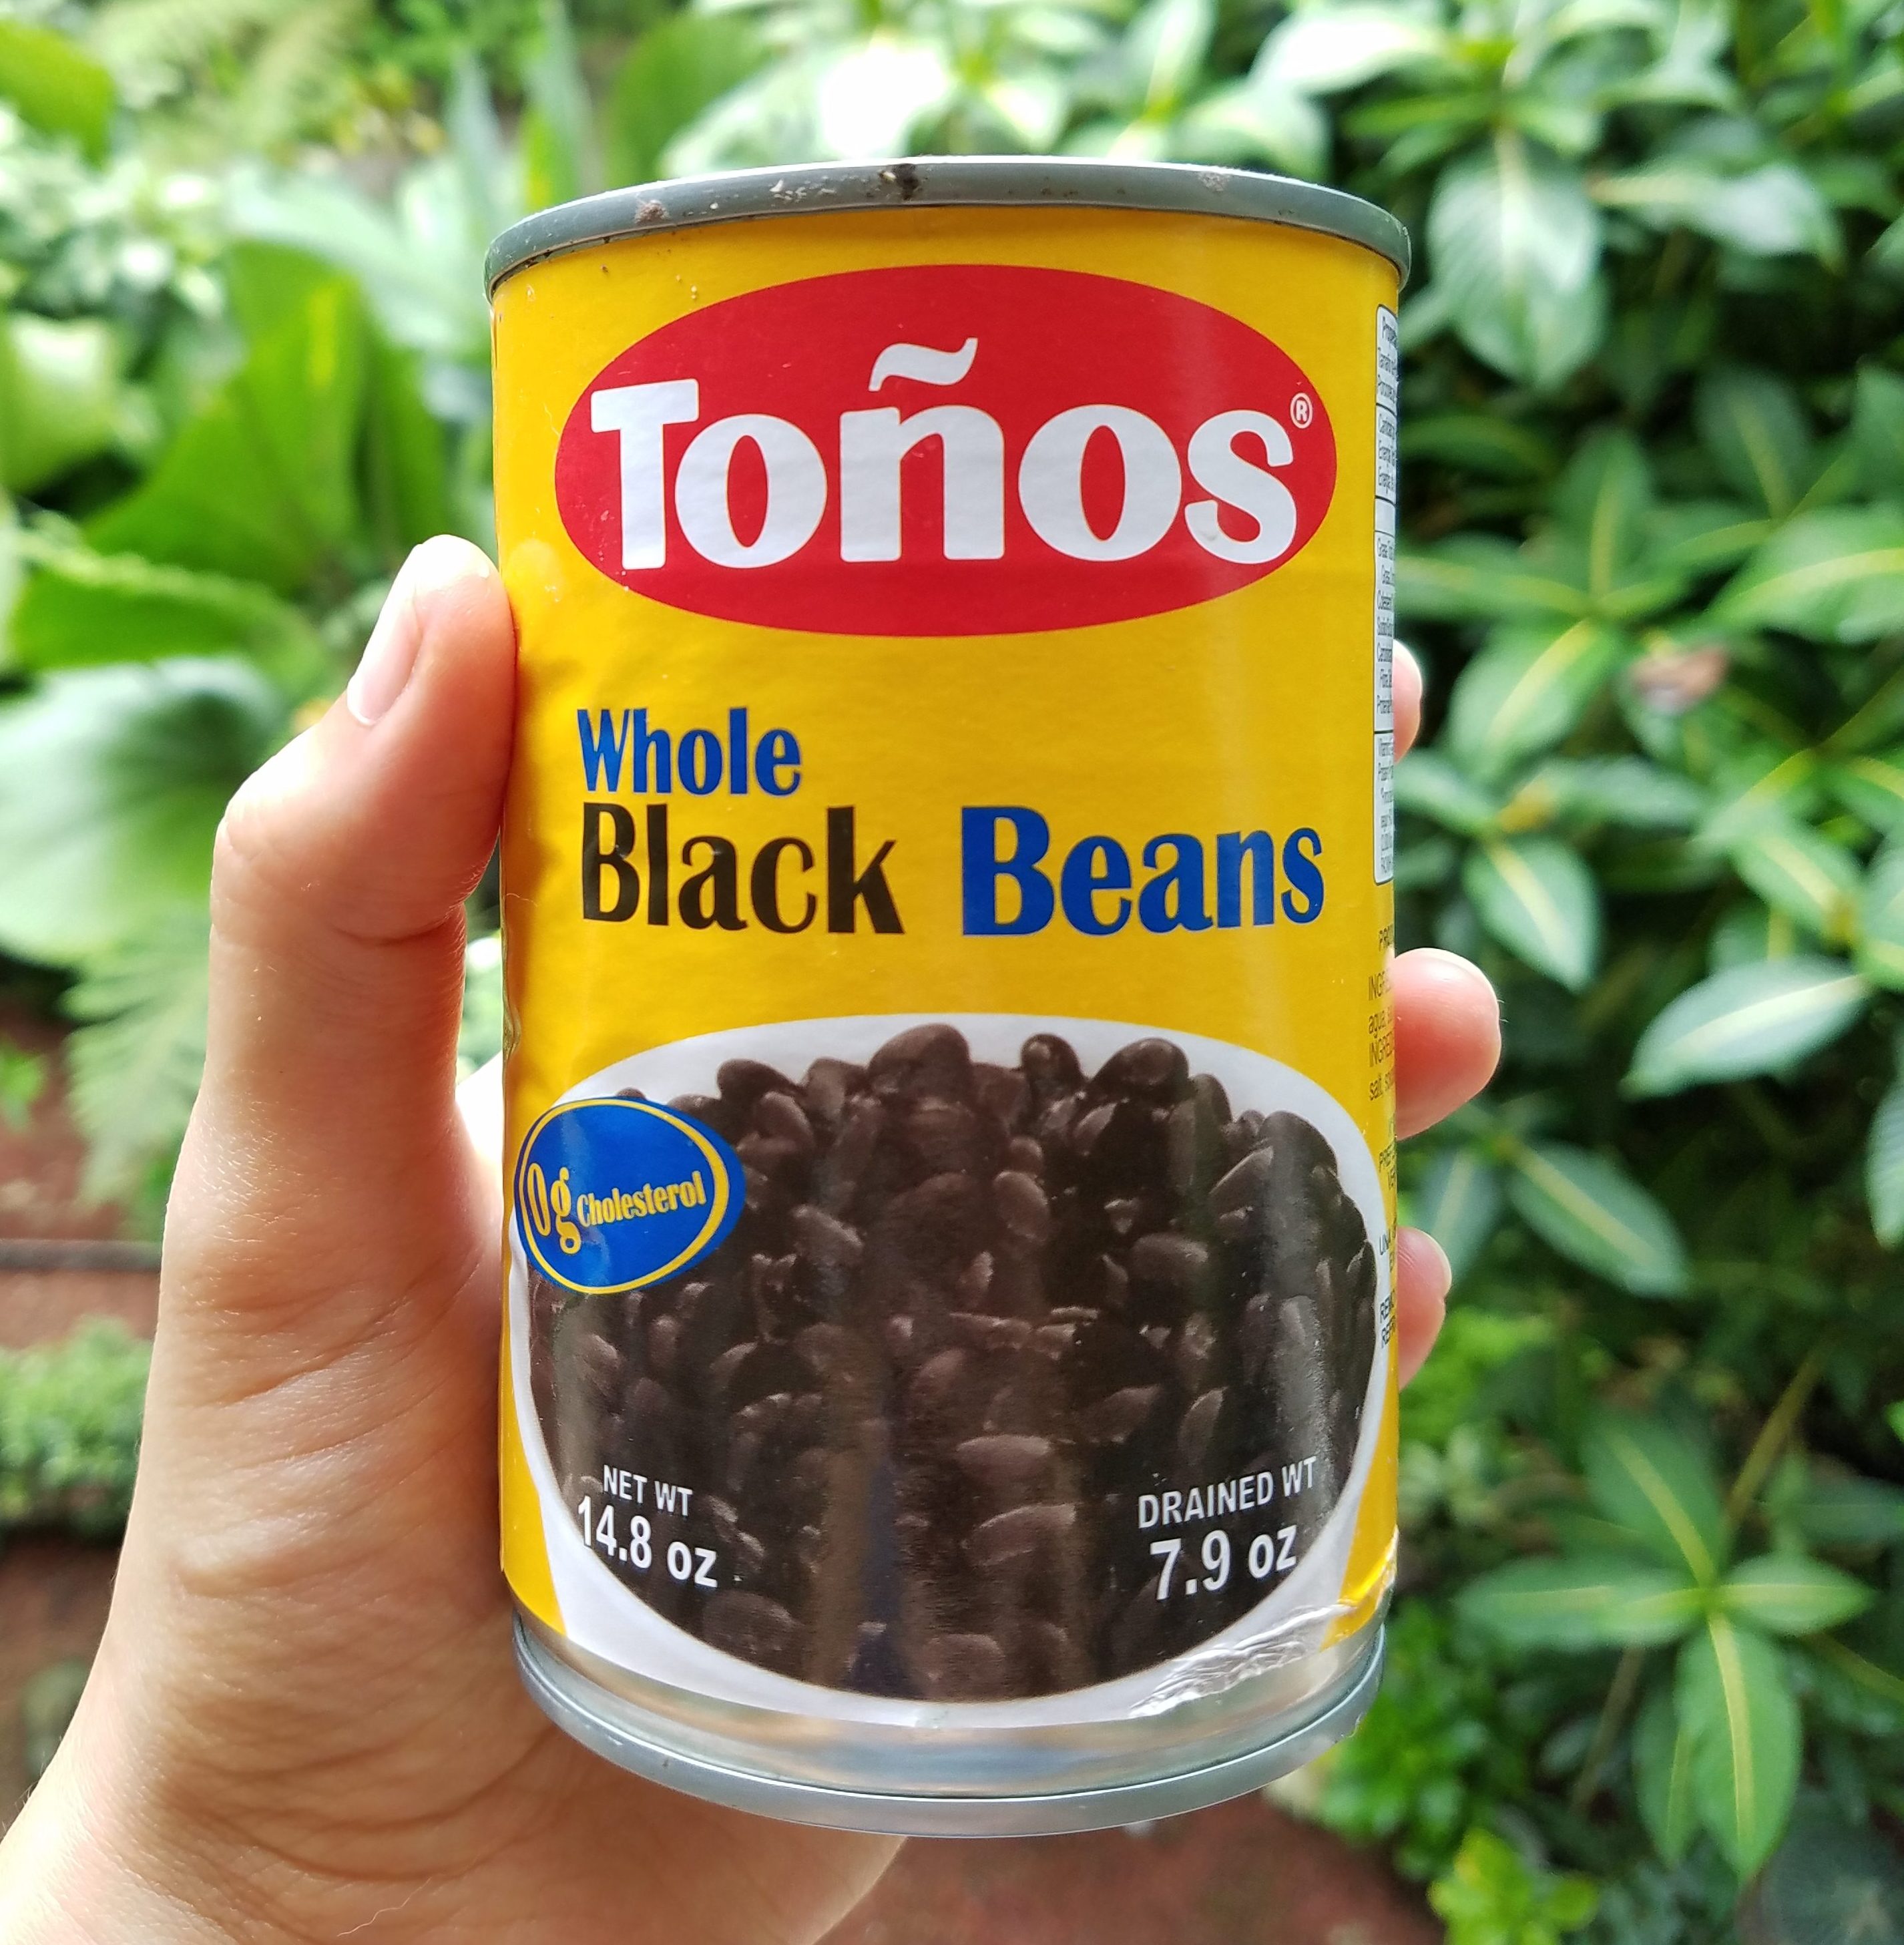
What kind of beans? Well, for this recipe, classic black beans. And yes, canned is just fine (though I’d recommend low or no-salt added to have better control of the sodium in your recipe).

Grab a handful of other ingredients – like fresh cilantro, onion, extra virgin olive oil, and lime – and you’re basically good to go.

Mmmmmmmmmmmmmm yas.

The bigger plus? This recipe makes at least 6-12 Chipotle portions if you get their rice bowl… and it costs less than one or two orders.

By the way, you can find an amazing tex-mex bowl recipe (along with tons of helpful info) in one of my best-selling books, the grocery store tour guide, which is also available as an ebook!

Without further ado – here it is! Try it out, share, and let me know what you think :)


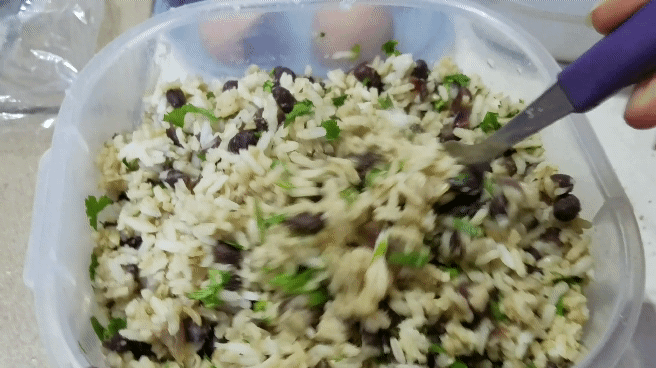
CILANTRO LIME RICE & BEANS (makes around 6 cooked cups)

  • 2 cups brown and/or white rice (before cooking) *cook according to packaging or using leftover rice is fine!
  • Half a large red onion, finely chopped
  • 1 Tbsp Extra Virgin Olive Oil
  • 1 (~8 oz.) can of Black Beans (preferably organic and low or no sodium to better control salt content), drained and rinsed
  • 1 small bushel of fresh cilantro, leaves picked and chopped (about 1/3 cup chopped)
  • The juice from one lime
  • 1 tsp. ground cumin
  • 1/4 tsp. sea salt (or more, to taste preference)
  • 1/4 tsp. black pepper (or according to taste)

Directions

  1. Cook rice according to package or use leftover rice. Two uncooked cups yields 4.5 to 6 cooked cups.
  2. In a fairly large saute pan heated at medium to high, saute onions in olive oil until fragrant and softened (about 2-3 minutes). Add rice and stir, letting cook for another 2-3 minutes.
  3. Add black beans, cumin, salt, and pepper. Stir to all incorporate. Lower heat to higher “low” spectrum, cover the pan, and let flavors marry for 3-4 minutes. You can also add 1/4 cup or so of water before covering, especially if the rice was leftover. This will add more moisture while cooking.
  4. Uncover and remove from heat. Stir in lime juice and cilantro, then taste and add more salt if necessary. Stir again and then ENJOY! :)

RECIPE: Homemade Coconut Milk (or Coconut Creamer) – Easy, Fast, GREAT for Dairy-Free Travelers!

This summer, I have been doing quite a bit of traveling. Starting off in beautiful Italy and then making my way to Latin America, I currently find myself in the middle of a legit jungle – monkeys howling and all – in the Southern Zone of Costa Rica.

Just hanging out off my balcony in Positano, Italy. Totally casual.

This tropical rainforest is amazing and refreshing, but also makes me miss a few small foodie preferences that have been a part of my daily routine for years.

Especially through the most recent experience living off-grid in an isolated, glorified tree house (thankfully with pretty impressive internet to benefit my online clients and me), I learned how to do without a number of American luxuries. These include everything from transportation (no car), no paved roads, no 24-hour convenience stores (or any stores within two miles), and no access to anything from supplements to electronics to mail being reliably being delivered…

Cuddly kittens and warm weather make everything better.

It also includes not being able to find carton-style coconut milk – never mind coconut creamer for coffee. And if you didn’t know, Costa Rica is known for its amazing coffee.

Needless to say, I’m not a milk drinker and never really have been. Anytime I’ve needed a “milk” for something, I’ve opted for the almond or coconut substitution. (If you have my book The Grocery Store Tour Guide, you’re probably familiar with this suggestion.)

Considering the fact that mango, banana, papaya, AND coconut trees are everywhere in this tropical part of the world, I was somewhat surprised that I couldn’t find any carton coconut (or almond) milk near the home I am currently living in. There is one market down the mountain (over 2 miles away and a 90-minute steady walk thanks to the incline) that has one small almond milk carton option, which was unsurprisingly overpriced… and expired by six months.

Luckily, there is also a decently stocked chain supermercado in the nearest town that is accessible by a 20-minute bus ride (in addition to the nearly three mile walk to the bus stop) where I did find a higher quality carton of pure organic coconut cream… but still no sign of a reasonably priced carton coconut OR almond milk.

Did I mention I’m in the [captivating, relaxing, sometimes boring, always magical, yet very remote] jungle?

Here is what I did manage to find in the local market: canned coconut cream (and canned coconut milk).

And the good news for my fellow dairy-free, non-leche drinking people out there? To make homemade Coconut Milk (a comparable version to Silk or Almond Breeze brands that you can use for shakes, cereal, or to simply drink as is) AND/OR Coconut Creamer for coffee or tea, all you need is a can or carton of coconut cream (a second option could be canned coconut milk), water, and a pour-able container to keep it in.

That’s it.

Fun fact: if you read the ingredients on a carton of the aforementioned popular American brands of coconut milk, you will see that they are mainly filtered water and coconut cream (with some added preservatives and vitamins)… which is exactly what’s happening here!

Of course I tend to get a little fancy and doctor things up, so I added a little bit of vanilla extract and a few stevia drops (which I obviously brought with me from the States) to make it taste just like slightly sweetened, cartoned vanilla coconut milk.

Whisking in a small amount of natural thickener such as xantham gum, guar gum, or gellan gum (if you can access it where you are) will lend a slightly thicker consistency that mimics store-bought Coconut Creamer even more – but the thinner, milkier version that results from this recipe suits my needs just fine. :)

And cost wise? One can of coconut cream cost me about 1500 colones (around $3 USD) and is enough for TWO to THREE GALLONS of drinkable coconut milk or creamer. One HALF gallon of Silk brand coconut milk typically costs $3-5 USD anywhere in the world that I’ve been, so this recipe is a very budget-friendly one that is well worth trying no matter where you are!

To prepare, you can whisk everything together or blend it in a blender. Then just pour into your chosen container like this perfect one I found on Amazon. It’s important to remember to keep it refrigerated and shake it up well before using each time since it does slightly separate (adding the thickening gum does help keep it more consistently smooth).

I mainly use this as a “creamer” for my coffee, but it would also make a great milk replacement for any of your milky needs.

Here’s the crazy simple recipe :) Enjoy!

Homemade Coconut Milk or Coffee Creamer

  • 14 C. coconut cream (ingredients should be only 100% coconut cream, if possible) OR 12 C. canned coconut milk (full fat, not “light”)  – shake cans well before opening
  • Slightly less than a 12 gallon of chilled, filtered water
  • Small pinch of sea salt
  • Optional (for vanilla flavor): 12 to 1 tsp. vanilla extract
  • Optional (for sweetness): Stevia drops to taste OR 1 Tbsp. cane sugar liquified in a small amount of warm water OR 1 Tbsp. maple syrup
  • Optional (for chocolate flavored): 1 Tbsp. unsweetened cocoa powder
  • Optional (for coffee flavored): 2 Tbsp. instant coffee granules liquified in a small amount of hot water
  • Optional (for thickness): 12 tsp. guar gum, xanthan gum, or gellan gum

Directions

  1. Put coconut cream or milk, chilled water, sea salt, and your optional ingredients of choice in a blender and blend on low until all incorporated, about 1-2 minutes (you can also whisk very well in a large bowl).
  2. Carefully pour into your milk jug or container.
  3. Refrigerate (shaking well before each use) and enjoy as a milk or creamer! It should be good for about two weeks, though mine never lasts that long. Yum!

*If it doesn’t turn out “milky” enough for you, simply add more coconut cream by the teaspoon (or coconut milk by the tablespoon) until your desired flavor and consistency is reached. To make it thicker and creamier, add in more thickening gum by the one-eighth of a teaspoon and blend well after each addition.

*You can freeze your remaining coconut cream/milk in a separate container for future use.

Interested in finding amazing homes to stay in around the world at no cost to you?

Sign up and get 20% off your membership at TrustedHousesitters.com, my favorite website for finding worldwide house and petsitting opportunities, by CLICKING HERE. I use and highly recommend it!

RECIPE: The BEST Cranberry Sauce (with a twist!) – Healthy, Vegan, Gluten Free

The holidays are upon us! A time for festive decoration, plenty of social events with coworkers, friends, and family, and a plethora of seasonal food favorites to enjoy.

If you’ve visited this blog before (or are subscribed to my YouTube channel), you have already gotten a taste for some of my go-to recipes for this time of year like:

I recently realized that the popular side dish and condiment, Cranberry Sauce, was missing from my growing arsenal of holiday recipes! So, now is the time to fix that.

Not only is the following recipe incredibly easy and with minimal ingredients, but it has an extra twist of flavor thanks to the mango juice, spices, and alternate sugar (like coconut). Plus, including apples and pears bumps up the nutritional value by increasing the vitamins, fiber, and flavonols to make your body one happy machine.


img_0689


Whatever you do – I beg you – never, ever choose those processed tin jars filled with a solid cylinder of cranberry jam. Then again, I can assure you that once you make this recipe you will never want to go back.

Without further ado, here’s this simple and amazing recipe! Try it out and let me know what you think… and feel free to share the link with others, too :)


The BEST Cranberry Sauce… with a twist!

Ingredients

  • 1¼ cups coconut sugar, light brown sugar, and/or cane sugar (I will usually use a third of each or whatever I have on hand)
  • 16 oz fresh cranberries (two 8-oz bags)
  • One Fuji apple, peeled and chopped
  • One Bartlett pear (slightly ripe), peeled and chopped
  • One cup mango nectar or juice
  • 1/8 tsp nutmeg or allspice
  • 1/4 tsp cinnamon

Directions

  1. Rinse and drain cranberries. Measure out the mango juice.
  2. In a medium saucepan, bring cranberries, sugar, and mango nectar to a boil on high heat. Cranberries should begin to pop and coagulate with the liquid.
  3. Lower heat and let simmer for 10 minutes before adding chopped apple and pear. Also add spices.
  4. Let simmer together another 5 minutes or so, until all incorporated (but apple and pear should maintain their form and not mush up).
  5. Serve warm or let cool and refrigerate overnight if you prefer serving cold cranberry jam… It’s delicious both ways! This will keep in a sealed container in the fridge for a week, though I’ve never had it last longer than a few days :)

Steps in Photos

img_0690

img_0691

img_0694

img_0697

img_0696

img_0698

img_0701


ENJOY!


RECIPE: How to Make HIGH PROTEIN PLANT BASED ICE CREAM – Vegan / Gluten Free / Nice Cream / Chocolate Lovers

I absolutely love this rich, chocolate “nice” cream and make it on the regular. It is not only easy and delicious, but the extra love from the legit hard chocolate shell topping really make it over the top.

ICE CREAM

This filling and flavorful dessert also happens to be a completely plant-based source of HIGH protein with over 30 grams in this recipe!  Plus, it’s great for any time of day: pre-workout, post-workout, breakfast, lunch, or dinner. Shoot, even dessert after a big ol’ salad.

Watch the video here, recipe is below:

EASY, RICH, CHOCOLATE “NICE” CREAM

Ingredients:

1 cup Frozen Blueberries

2 Ripe Bananas, sliced and frozen solid

1-2 Tbsp High-Quality Cocoa Powder (like my favorite: Pernigotti Cocoa)

1 Scoop Plant Based Protein Powder (recommend: RawFusion Plant-Based Protein)

Generous Sprinkle of Ground Cinnamon

Small splash of Balsamic Vinegar

About a quarter to a third cup of Unsweetened Almond Milk (for desired consistency)

Directions:

  • Put the ingredients, in the order shown, into a high powder blender or food processor. Blend until all incorporated. Add more almond milk for desired consistency. Blend until smooth. Pour into bowl and set in freezer for 15-20 minutes.

To make the HARD CHOCOLATE SHELL COATING:

In a small bowl, mix: ½ Tbsp. melted coconut oil, 4-5 drops Liquid Stevia, a scant teaspoon high-quality cocoa powder, and a pinch of salt. Mix until smooth.

  • Take the bowl of ice cream out of the freezer and pour the chocolate shell coating mixture all over the top, using a spatula to get every last bit. It will harden in seconds.
  • Top your “nice” cream with something crunchy, like hemp hearts, chopped nuts, or sesame seeds.
  • Enjoy! :)

Presentation1


Find more recipes and smart food-shopping tips in my Grocery Store Tour Guide!

RECIPE: How to Make the BEST Banana Pancakes – Vegan / Easy / Single-Serving / Gluten Free

This is one of my GO-TO recipes for the easiest, most delicious, minimal-ingredient Banana Pancakes ever…

Banana Pancakes thumbnail

I have this almost every morning with my “moon egg” (if you don’t know what I’m talking about, check out this video: https://youtu.be/pNkGUw9HPNE).

These Banana Pancakes are not only moist and delicious, but also happen to be vegan, gluten free, and sugar free (for you fans of the “free’s” out there) while being very fiber- and nutrient-rich. Not to mention, crazy flavorful!

WATCH THE VIDEO HERE, FULL RECIPE IS BELOW:

 
SINGLE-SERVING BANANA PANCAKES

Ingredients:

A Splash of Apple Cider Vinegar (about 2 tsp.)

½ cup Unsweetened Almond Milk to start (have more on hand to get batter consistency)

A small splash of Pure Vanilla Extract (about ½ tsp.)

4-5 drops of Liquid Stevia (to taste)

½ of One Large, Ripe Banana (make sure it is spotty with brown and NOT green or all yellow)

1 Tbsp. Chia or Flaxseeds (or one packet of this Flax Chia Blend by Carrington Farms)

½ cup Quick Cooking Oats, pulsed in a blender or food processor to be semi-ground

½ tsp. Baking Powder

Generous sprinkle of Ground Cinnamon

A pinch of salt

DIRECTIONS

  • Get out a 2-cup Liquid measuring cup, like this one I use in the video and a mini-spatula or fork. Put all of the liquid ingredients in the measuring cup (measuring as you go), stir, and let sit for a few minutes.
  • Take half of the banana and break it apart with your fingers as you add to the liquid ingredients. Then take a fork and mash/mix it in until larger chunks are gone.
  • Add in all dry ingredients, mixing well. Add more almond milk (typically ¼ to of a cup) until it is more of a moderate batter consistency – not too thin, but not thick. Allow the batter to thicken by letting it sit ~5-10 minutes.
  • Preheat stove top to medium heat (I typically go to level 4). Once pan is heated, spray pan with coconut oil spray. Give batter a quick stir and pour in about ¼ cup per pancake.
  • Set a timer for 3 minutes, then flip. Pancakes should be a light golden brown. Let other side cook another 3 minutes.
  • This makes 4-6 pancakes depending on your size. I like to pour a little maple syrup on the side and dip them, but you can also stack ’em up pretty and pour maple syrup on top! Feel free to slice up the other half of your banana to top them off, too!
  • ENJOY (I know you will… they’re amazing) :)

bananapancakes


Find more recipes and smart food-shopping tips in my Grocery Store Tour Guide!


Easy, Homemade Oat Waffles (or pancakes) – gluten-free, vegan, low-fat, delicious! (RECIPE)

If you’re looking for a twist on getting healthy oats in for breakfast, but want to venture from the typical (delicious) bowl of warm oatmeal as your only vehicle – this recipe is exactly what you need.

EASY, Homemade Oat Waffles (or pancakes, if you don’t have a waffle maker).

20160207_114526

This recipe takes less than ten minutes to put together, twelve total minutes to cook, and the result is two giant waffles (which can yield 2-4 servings depending on your size and satiation) or 6-8 medium pancakes. It also utilizes ingredients that can all be found on the grocery list within The Grocery Store Tour Guide & Nutritional Workbook.

And if you’re worried about the overt denseness that a lot of oat-based recipes are guilty of producing? You’ll see that these waffles – though seemingly more dense than those made with a typical store-bought batter at first – turn out perfectly crispy on the outside while staying soft and fluffy on the inside.

20160207_114314

Plus, these high-fiber waffles will help satiate you and keep you full much longer than processed or store-bought mix versions. You can enjoy them with a touch of maple syrup or honey, eat them aside a scramble, or even use two pieces as your bread for an almond butter and banana sandwich.

You can even make these in bulk and freeze them. Just pull your serving out of the freezer and heat up in the toaster oven whenever a waffle-urge hits!

20160207_114230

As for the waffle maker I use, it is the Presto FlipSide Waffle Maker and it is amazing. I got it off of Amazon over two years ago and use it once a week on average, if not more. It not only makes the perfect waffles every time, but can be used as a sandwich press, scramble cooker, hash browns, and for tons of other sweet or savory concoctions. It’s easy to clean, takes up no kitchen space to store, and is virtually fail-proof.

20160207_112250

Basically, don’t be surprised if I organize a compilation of recipes utilizing this thing for a special eBook in the future… because it’s that awesome.

Once you bite into one of these crisp and fluffy waffles, you will taste their mild sweetness and hint of vanilla with cinnamon. They have just the right amount of whole-grain flavor while keeping the traditional feel of a classic Belgian waffle.

Now, enough talk. Onto this delicious recipe!


HOMEMADE OAT WAFFLES (or pancakes) *photos below

  • 1 cup of quick-minute or old fashioned rolled oats
  • ½ cup flour (I use a gluten-free flour blend, like Trader Joe’s brand)
  • 1 Tbsp. xylitol (or sweetener of choice, like stevia for baking, turbinado, regular sugar, or coconut sugar)
  • 2 tsp. baking powder
  • tsp salt
  • ½ tsp. ground cinnamon
  • 1 cup almond milk (I use unsweetened vanilla flavored)
  • 2 tsp. apple cider vinegar
  • 1 tsp. pure vanilla extract
  • ~8 drops liquid stevia (if you do not have this, use 2 Tbsp of your above sugar/sweetener instead of one)
  • 1 whole egg or a flax substitute (using a 1:3 ratio of ground flaxseed to water)
  • 1 tsp. coconut oil
  • Non-stick cooking spray (like Trader Joe’s Coconut Oil Spray) for the waffle maker or pan
  1. Get out a large bowl, a liquid measuring cup (at least 16 oz large), your blender/food processor, and your waffle maker.
  2. Pour almond milk and apple cider vinegar into the measuring cup. Whisk and let sit as you do the following steps.
  3. Put oats into your blender or food processor and blend for about ten seconds, or until they are ground to about half the consistency that they were beforehand (see photos below).
  4. Into your large bowl, put oats, flour, baking powder, xylitol/sweetener, salt, and cinnamon. Whisk altogether to incorporate.
  5. Into the measuring cup with liquids, add vanilla extract, liquid stevia, and egg (if using). Whisk to blend well and make sure egg is mixed, then add liquids to dry ingredients in bowl. Whisk well.
  6. Add flax-egg substitute, if using, and coconut oil into bowl. Whisk well (making sure coconut oil blends since it may be more solid due to the cold batter). Let batter sit for at least ten minutes to thicken.
  7. Plug in waffle maker to let it preheat (or begin heating pan, if making pancakes, on medium-high heat).
  8. After batter has rested for at least ten minutes, give a quick stir and pour it all into the liquid measuring cup. Scrape the bowl with a spatula to ensure you get all of the waffly-pancaky batter goodness into the cup (photo below).
  9. Once waffle maker is heated, open and spray lightly with non-stick spray on both sides. Give batter a quick stir and pour exactly half (or 1 cup) of your batter into the center of the waffle maker. Close, set timer for 6 minutes, and flip to other side (if you are using the same Presto FlipSide waffle maker I own).
  10. Once the timer goes off, check your waffles. They should be light and slightly golden in color (see photos). Feel free to let them cook an additional 1-2 minutes if you like a really well-done and crispy waffle.
  11. Enjoy however you like! *To maintain crispness if you do not plan on eating immediately, set your oven to about 200 degrees F and place cooked waffles directly on the racks. This will keep them from getting soft as it keeps them warm. If you plan on freezing them, make sure they are cooled completely on a rack before freezing.

Remember to tag #truehealthtrifecta and share how you like this recipe on the True Health Trifecta Facebook page!

Step-by-step photos:

20160207_110133

20160207_110328

20160207_111316

20160207_112140

20160207_112703

20160207_112734

20160207_112826

20160207_112858

20160207_114224

20160207_114329

20160207_114509

Sautéed Cabbage & Carrots: my UNIVERSAL side dish! (RECIPE)

This dish has been a legit staple in my household for a long time now and, even still, I find myself craving it almost daily.

20160118_193933

I even included this as a bonus recipe in my latest book, The Grocery Store Tour Guide & Nutritional Workbook (which will be available in just one week… and I am super excited about sharing with you all)!

Before I get into this insanely easy and flavorful recipe, here’s a little bit more about the 70-page Grocery Store Tour Guide & Nutritional Workbook. This beautifully designed, visual book contains a plethora of useful information, including:

  • Shopping preparation tips
  • Explanations about supermarket psychology
  • How to identify and define misleading label claims
  • Tidbits about nutritional lingo and regulated terms, such as GMO, Certified Organic, Gluten Free, etc.
  • Food storage and safety tips
  • A thorough seasonal produce chart
  • Aisle-by-aisle tips to navigate the supermarket like a health-conscious pro
  • A list of ingredients to avoid
  • My personal kitchen essentials
  • Easy Meal and snack recipes
  • A post-tour quiz (if you are a trainer or nutrition coach, this e-book is great to use with clients!)
  • Much, much more…

Plus, unlike my print-only book – The Holistic Fitness Starter Guide – which will be available at the end of the month, I decided to publish The Grocery Store Tour Guide in print and as a quickly accessible e-book. This means that as soon as you buy it here, you will be able to download it to your PC, laptop, or tablet immediately and begin reading while you wait for the printed copy to arrive!

How cool is that?!

Now, as exciting as this new book is, back to the deliciousness that is My Universal Side Dish. First of all, it’s crazy simple to make since we are using pre-shredded cabbage and carrots. The only chopping involves the fresh herbs, ginger, and garlic (unless you have minced ginger and garlic in jars, in which case, this may be the easiest recipe ever).

20151212_171501

This is also so incredibly flavorful thanks to the fresh Rosemary and Thyme. Sometimes, I’ll add in fresh basil or sage and it becomes a bigger explosion of flavor in your mouth.

As I mention in The Grocery Store Tour Guide & Nutritional Workbook, this side dish goes well with nearly everything. On salads, sandwiches, in wraps, or by itself. It’s fast to whip up and perfect to keep ready-handed in the fridge. One of my favorite ways is wrapped up in rice paper wraps with some thin rice noodles.

20151212_180806


20160118_192837


Give this recipe a try. I promise you will be happy you did!


MY UNIVERSAL SIDE DISH: SAUTéED CABBAGE AND CARROTS

Ingredients:

2 (10-16 oz.) bags of Shredded Cabbage

½ of one (10-12 oz.) bag of Shredded Carrots

1 Tbsp. fresh Rosemary (leaves from about three 4” sprigs), chopped

1 Tbsp. fresh Thyme (leaves from about 5 4” sprigs), chopped

1-2 inches of fresh ginger root, peeled and minced

2 garlic cloves, minced

1 Tbsp. Coconut Oil

Salt & Pepper to taste


Directions (photos below):

  • Heat a large sauté pan or wok on the stove at medium to medium-high heat and place coconut oil in the pan.
  • Once the coconut oil is melted, add ½ bag of carrots and two bags of cabbage. Sprinkle minced ginger on top and season the surface with salt and pepper. Cover to let cook down about 5-7 minutes. (The pan may seem really full, but the veggies cook down quite a bit.)
  • Remove lid and toss the cabbage and carrots to encourage even wilting/cooking. Cover and let continue softening for another 3-5 minutes.
  • Remove lid and add rosemary, thyme, and minced garlic. Toss well until all the herbs are well incorporated into the mix. (If the veggies seem to be browning from the bottom of the pan, lower the heat a little bit.)
  • Continue cooking, tossing occasionally, until veggies are softened and cooked down to a little less than half of the original volume. Add more salt to taste, if needed.

Enjoy in any which way!


20160118_191339


20160118_192511


20151208_170028


20160118_192828


20160118_194010


20151212_180719

Classic Sweet Potato Casserole with a twist (RECIPE) – Dairy free, Vegan, Delicious!

Did you know that the delicious and sugary Thanksgiving dish we know and love – the sweet potato casserole with browned marshmallows on top – was created by the marshmallow lobby in the early 1900’s? (You can learn a little more here.)

20151126_164036

I know, that may slightly tear away some magic from this classic dish. But the fact is, so many popularized, American foods that aren’t actually nutritious or beneficial – such as marshmallows – have simply become what they are due to smart advertising. Instead of getting too into the psychology and economics involved in the food industry (and further crapping on anyone’s marshmallow-loving parade), let’s just learn a little bit about marshmallows and where they came from.

Originating in ancient Egypt, marshmallows were a honey-sweetened candy made using the sap from the marshmallow root plant. It was soft and chewy, and used medicinally for ailments like sore throats.

Fast forward a few hundred years to the 19th century, and the labor-intensive methods of extracting marshmallow root sap made manufacturers come up with new processes (and involve new ingredients) which brought us to how we know the marshmallow today – as a light, fluffy, campfire treat which also tops the holiday sweet potato casserole.

Today’s version of the confection no longer contains the source ingredient of it’s name – marshmallow root – but instead, it is made up of a stabilizing protein such as gelatin (or agar, in Vegan versions) and sucrose (often with high fructose corn syrup).

20151205_235408

That said, there is nothing wrong with incorporating the better quality versions of marshmallows when making this crowd-pleasing dish once or twice a year. I use Dandies mini marshmallows, which contain no corn syrup, no gelatin, and no genetically modified ingredients. And, yes, they taste EXACTLY like your classic, name brand marshmallows – if not better.

As for the secret ingredient that gives this casserole a twist? Well, that would be mango juice of course.

20151205_235356

Most “classic” recipes call for heavy cream, which is meant to contribute creamy richness. It doesn’t really alter the flavor, but it does bring in a LOT of unnecessary fat and calories. You won’t find heavy cream or ANY dairy within this recipe, which has been a hit at many-a-holiday-dinner time and time again.

A Helpful Hint: If you choose go to back to your traditional sweet potato casserole recipe after trying this one (dare I say, doubtful?) try substituting canned coconut milk for your heavy cream. Though it will not lessen the overall calories or fat content, it will maintain the same creamy consistency and add a complimentary touch of flavor. All while being more plant-based friendly and allergen free.

If you just want to make a great sweet potato mash, you can stop before step 4 below and enjoy as is. It is just as delicious (and plenty sweet) without the marshmallow topping!

Sometimes the deliciousness can't wait for a photo opp, as shown here.
Sometimes the deliciousness can’t wait for a photo opp, as proven by the devoured portion above.

CLASSIC SWEET POTATO CASSEROLE RECIPE (with a twist)

  • 3 lbs Sweet Potatoes (about 4 large or 5 medium spuds)
  • 1 tsp. pure vanilla extract
  • 1/2 cup mango juice/nectar *I’m sure pineapple or orange juice would work, too… but try to find mango!
  • 2 Tbsp. coconut sugar or light brown sugar
  • 1/2 tsp. ground cinnamon
  • 1/4 tsp. sea salt
  • 1/2 cup pecan halves, chopped
  • Half a bag (5 oz.) of quality marshmallows *I use homemade, locally made, or Dandies mini-marshmallows
  1. Preheat oven to 450 degrees F and line a baking sheet with tin foil.
  2. Wash the sweet potatoes in the sink and pat dry. Pierce the tops of the potatoes with a fork, 2-3 times, before placing (holes up) on the baking sheet. Put in the oven for about 45-55 minutes, until sweet potatoes are fork tender and syrup begins to ooze out from the holes. Remove from oven and let cool until they aren’t too hot to be handled (usually 15-20 minutes).
  3. Lower the oven to 375 degrees F. Grab your 8×8 glass baking dish (metal is fine too, I’m sure – and 9×9 would also work). Peel the potatoes, putting the yummy orange flesh straight into the baking dish. Mash well with a potato masher or large fork. Add the vanilla extract, mango juice, sugar, cinnamon, and sea salt. Mash and mix together until all incorporated.
  4. Use a spatula or the back of a spoon to even out top of the mash. Sprinkle the chopped pecans evenly all over the surface. Then do the same with the marshmallows.
  5. Place on center rack in oven and bake at 375 degrees F for about 25 minutes, or until marshmallows begin to turn golden brown. Remove, let cool slightly, and enjoy!

*You can also make the dish ahead of time. Simply cover the mash in the baking dish after step 3 and refrigerate for up to 2 days. When ready to bake, remove from fridge for about 20 minutes to take the chill off and preheat the oven. Then add pecans and marshmallows, and bake as instructed above!

20151126_164045
Impromptu dinner paparazzi – starring the BEST sweet potato casserole!

Kale & Quinoa Bowl: Easiest, Filling, Nutritious Go-To Meal (RECIPE)

I introduce you to my latest obsession:


Nom nom nom....


You can’t really tell by the picture, but that bowl is HUGE and it’s holding 1 cup of cooked quinoa and 100g of chopped kale… along with an insanely delicious dressing that I will share below. This simple whole food duo is the perfect, delicious, filling, hearty base for so many different things – the list is nearly endless.

You can go savory, sweet, or spicy; you can add everything from more vegetables like tomatoes, cucumber, zucchini, or pumpkin – to fruits like chopped dates, figs, berries, or apples.

Another super bonus? If you’ve put yourself into a nutritional category box – I bet this fits into it. It’s all the “free’s” (Gluten-free, Dairy-free, nearly fat-free, egg-free) and all the “friendly’s” (Paleo-friendly, Vegetarian–friendly, Vegan-friendly, Carb-friendly, Allergen-friendly).

And when it comes to macro-nutrient ratios, this particular serving size has:

272 Calories

11g Protein

39g Carbs

5g Fat

7g Fiber

56g Sodium

Adding even more benefit? Both of these foods are incredibly nutrient dense in not only the macros above, but the micros such as: tons of anti-inflammatory phytonutrients, vitamins and minerals ranging from B-vitamins to Vitamin E and zinc, body-loving fibers, and more.

Basically, quinoa and kale are soul mates in my book.

Like I said, there are ENDLESS directions this two-ingredient base can go; but let’s start with one of my favorites these days…

Creamy Southwest Spice Dressing

Ingredients:

  • 2-3 Tbsp Lemon Juice
  • .5 to 1 Tbsp Extra Virgin Olive Oil
  • 1 heaping tsp Tahini (sesame seed butter, in Middle Eastern section of most markets)
  • 1 Tbsp Dijon Mustard
  • 2 tsp Mrs Dash salt-free Southwest Chipotle Seasoning
  • 1/4 tsp Himalayan Sea Salt (I just fresh grind in to taste)
  • 2 Tbsp Balsamic Vinegar
  • 1 Scant Tbsp Garlic Powder OR 2 cloves minced garlic
  • 2 tsp Onion Powder OR 2 Tbsp minced red onion
  • Freshly Ground Black Pepper (to taste… I like quite a bit)
  • Half a dropper of liquid Stevia, OR 1/2 Tbsp honey, OR 1 Tbsp Stevia in the Raw

Directions: Put it all in a bowl, whisk together, and toss with quinoa and kale…. That’s it. (Hint: make ahead of time by at least 30 minutes to let the flavors all soak up and merry. Nom!)

I always have a few cups of cooked quinoa in the fridge that I prepare in bulk in my rice cooker, one or two days a week. As for the kale, get 2-3 BIG handfuls, remove any stems (they tend to be a bit bitter sometimes), and chop up well before tossing.

Coming soon:

The True Health Trifecta Nutrition & Recipe Book:

Simple Salads, Soups, Sauces, & Dressings Edition!

This is turning out to be the perfect collection for everyone; from those beginning their health and fitness journey, to those well on their way and looking for new, EASY, healthy go-to meal ideas!

It will include TONS of crazy-easy yet healthy recipes like the one above; plus photos, nutritional facts & tips, kitchen & pantry basics and recommendations, my Macro-Nutrient Cheat Sheet, Pre- and Post- workout meal ideas, Soups, Salads, Dressings, and more!

Not to mention, unless you are allergic to a specific food, this book is EVERY-diet friendly! So whether you have put yourself in the Paleo box, Vegan category, High-carb-low-fat, Low-carb, Gluten-free, 80/10/10, intermittent fasting, carb-cycling… I purposefully made this a compilation of nutritious options that can be enjoyed by the majority of dietary lifestyles out there!

And, I know most people don’t have the time or interest to become the next Iron Chef in the kitchen… especially with the hustle and bustle of every day life. That’s why I made sure the recipes and tips in this book aren’t incredibly elaborate or time consuming. These are some simple basics to help anyone successfully achieve their goals without spending hours preparing and while getting in nutrient-dense foods that taste flipping amazing.

Can you tell how mega excited I am to be putting this together for you guys?! :)

Make sure to sign up for the newsletter and like the True Health Trifecta Facebook page for word on when it is available for sale in the shop! :)

Discipline and Nutrition

I was going over a piece of reading material in my arsenal, the NFPT Fitness Nutrition Specialist Manual, and came across a great section entitled Discipline and Nutrition. It relays my personal perspective on the subject almost perfectly, as well as my personal practice with clients (and friends) regarding nutrition, diet, training, and reaching their goals. I only hope all fitness, health, and nutrition professionals feel the same! …

“Let us equate your pet’s diet to your own, or to that of one of your clients’. While it is almost certain that pet food is less palatable than let’s say, a steak, or a slice of apple pie, a properly raised and well-disciplined pet, having never tasted steak or apple pie, will want for nothing. Wouldn’t it be wonderful to have been born into a world where junk food and dietary temptation never even existed? We too then, would want for nothing. We would eat simply for the purpose of sustaining our body’s dietary needs, and never be faced with making that decision between cookies and grapes. We would be eating nothing but natural healthy foods just like our ancestors, and just like our bodies were created to eat.

Imagine the difference junk-free eating would make in all of our lives. Hundreds of thousands of people around the world currently suffering from every possible diet related disorder ranging anywhere from high blood pressure to diabetes; from depression and low self-esteem to the hyperactivity common in our children brought on by hypoglycemia; from cardiovascular diseases to obesity. Just think of how difficult it would be in terms of breaking habits and unlearning eating behavior to go back to totally natural foods. While this may seem somewhat unattainable, as a fitness professional, you need to make the effort. It will take you a long way down the road to client respect and success as a fitness professional to do so.

The toughest part of eating right is in the early stages when the very thought of all your favorite foods affect your taste buds. And, like it or not, the real problem doesn’t exist solely in your mouth, but more so in the back of your mind. No, not the deep subconscious either, rather in certain centers in the brain that are specific to causing physiological responses such as salivation, at the very thought or sight of different foods. You would be amazed to learn how much money actually goes into psychological research in putting together television advertisements for foods. The sole intention of this research is to manipulate regions of our minds in order to sell us a food product.

As you can easily see, you are definitely fighting an uphill battle all the way in declaring war on junk food. Only the strong willed, and the incredibly disciplined even stand a chance for success in establishing and maintaining life-long healthy eating behaviors. Only through effective and continued short-term goal setting, a serious and strong source of motivation, and a crystal clear vision of your ultimate achievement, can you ever hope to survive the arduous drudgery of taste bud denial in the preliminary stages of this dietary transition.

How long do you have to stick to a bland, healthy diet before you lose this taste for junk food? The answer is simple… as long as it takes. As is true with any worthwhile pursuit, if it means enough to you, you will do whatever it takes to get the job done. We all have our breaking point when it comes to healthy eating, too. Many people would prefer to have their skin slowly and quite painfully peeled away, rather than having to go even one night without their half gallon of ice cream. While others may be able to simply put the thought of certain foods out of their minds completely and focus clearly on their goals and visions of the ultimate achievement.

Strict dieting is therefore not for everyone, as we all have different levels of tolerance to the actions of the brain centers that actually control taste. This is obviously reflected in the emotional roller coaster ride many overweight Americans are currently on, seemingly at the mercy of their brain centers’ regulation of taste, and the resulting failure to consume fewer calories, and partake exclusively of healthier foods. If anyone has the motivation to succeed it would be the obese. One must also recognize that our society is not exactly conducive to weight control either, with all the psychological manipulation in the food service industry, outrageous portion sizes, confusing food product labeling, and many food labeling practices bordering on being fraudulent, it is almost as though the cards are stacked against those wishing to make a positive change to their dietary practices.

This chapter was not intended to suggest a willingness to accept a client’s inability to change his or her eating habits on your part, on the contrary, it is intended to encourage an element of patience, and compassion for these people. What may come easy for you may be next to impossible for someone else. These people need to know you’re on their side. No matter how frustrated you feel about a client’s failure to adhere to your dietary recommendations, you should always be supportive, compassionate, and most importantly, a friend!”